Separate hardware support from brush behavior
First identify the Apple Pencil model. Apple Pencil Pro, Apple Pencil (2nd generation), and Apple Pencil (1st generation) support pressure; Apple Pencil (USB-C) does not. If the model supports pressure, check its connection, then use Procreate's documented diagnostic pair before editing global settings: Classic Library > Painting > Round Brush and Classic Library > Calligraphy > Monoline (Procreate 5.4). Different responses are a reason to inspect brush settings, but they do not by themselves exclude a global curve or Pencil input issue.
Pressure test outcomes
| Test result | Likely scope | Next step |
|---|---|---|
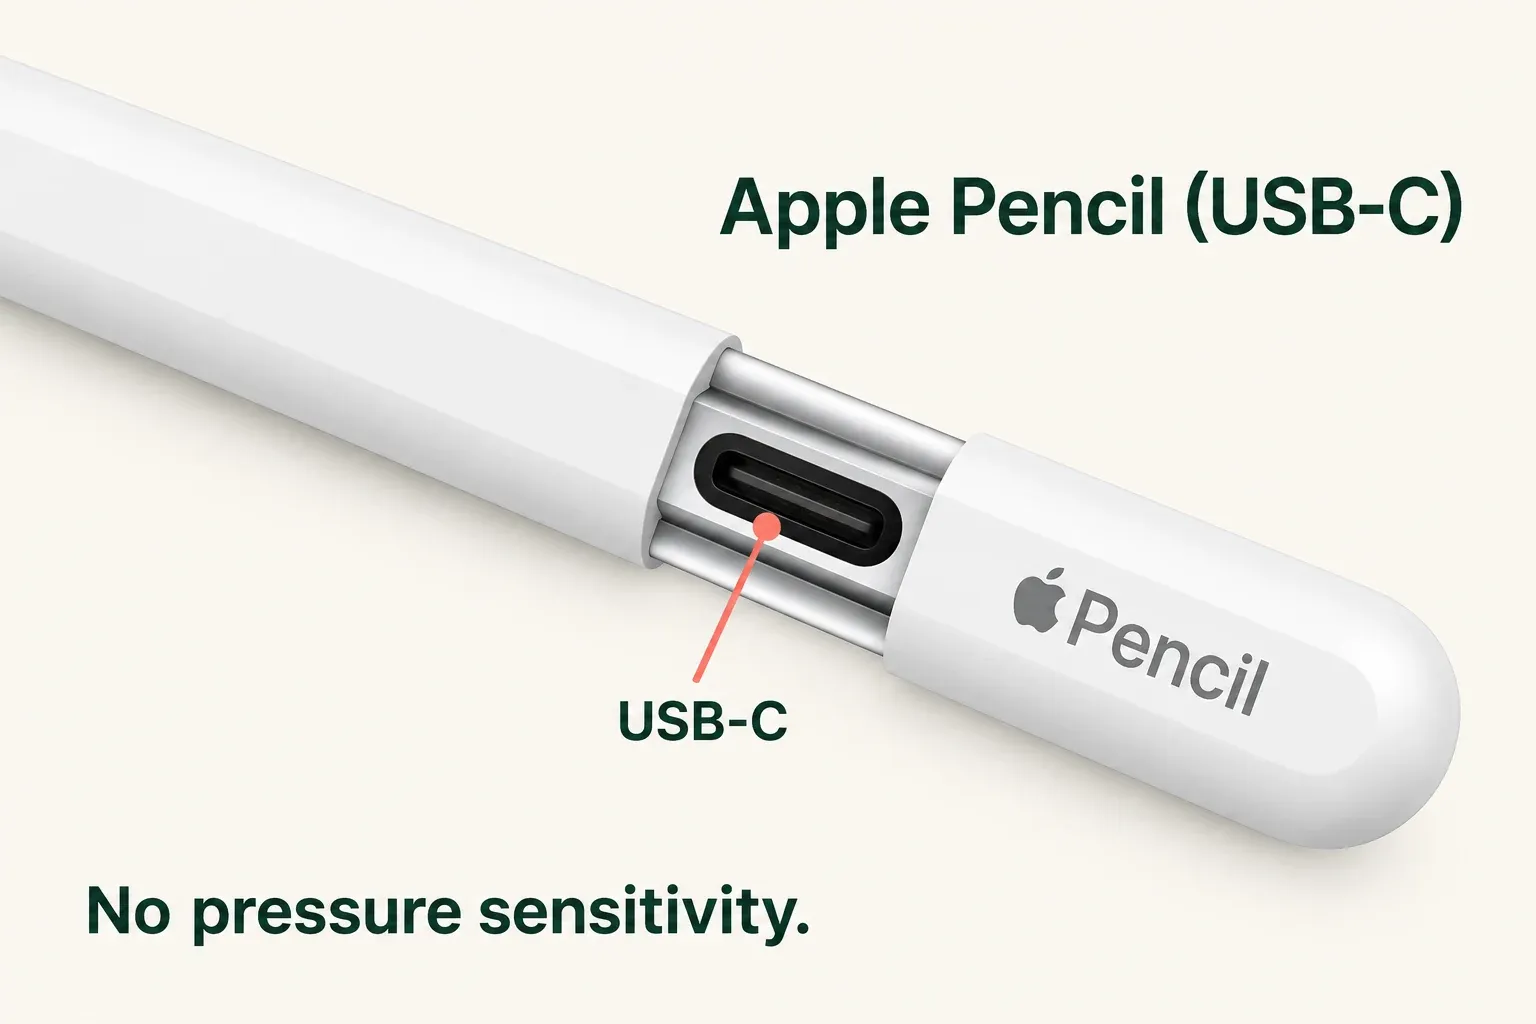
| Apple Pencil (USB-C) has no pressure response | Expected hardware capability | Use size and opacity controls rather than pressure |
| Monoline draws but Round Brush stays transparent | Possible Pencil pressure/input issue | Check compatibility, charge and connection; then inspect pressure settings |
| Round Brush responds; one custom brush does not | Custom brush settings are the next check | Duplicate the custom brush and inspect its Apple Pencil controls |
| Pressure changes only with unusually firm strokes | Global pressure curve or brush response | Record current settings and adjust in small steps |
Identify the Apple Pencil model
Apple Pencil Pro supports pressure sensitivity. Apple Pencil (2nd generation) and Apple Pencil (1st generation) also support pressure. Apple Pencil (USB-C) does not. If you have the USB-C model, tilt can still change supported brushes, but pressing harder will not produce pressure input for size or opacity.
Check the exact Pencil name on its packaging or purchase record, then compare that named model with Apple's Pencil model information. If you cannot establish the model, ask Apple to identify it before treating absent pressure as a fault. A stylus that draws or reacts to tilt is not necessarily a pressure-capable Pencil.
For the iPad, Apple gives the Settings → General → About → Model Name route on iPadOS or iOS 12.2 or later. Record that exact name for the compatibility check below; this route identifies the iPad, not the Pencil.
Confirm the connection
Open iPad Settings → Bluetooth and confirm that Apple Pencil shows as connected. Check the Pencil model's compatibility with your exact iPad. Charge it, check that the nib is clean and firmly attached, and follow the model-specific reconnection guidance; a cable, magnetic connection or adapter requirement depends on the model. Restart the iPad if the connection is unstable. Once paired with the iPad, Apple Pencil needs no separate connection inside Procreate. Tapping the interface alone does not prove that pressure input is working.
Compare Round Brush and Monoline
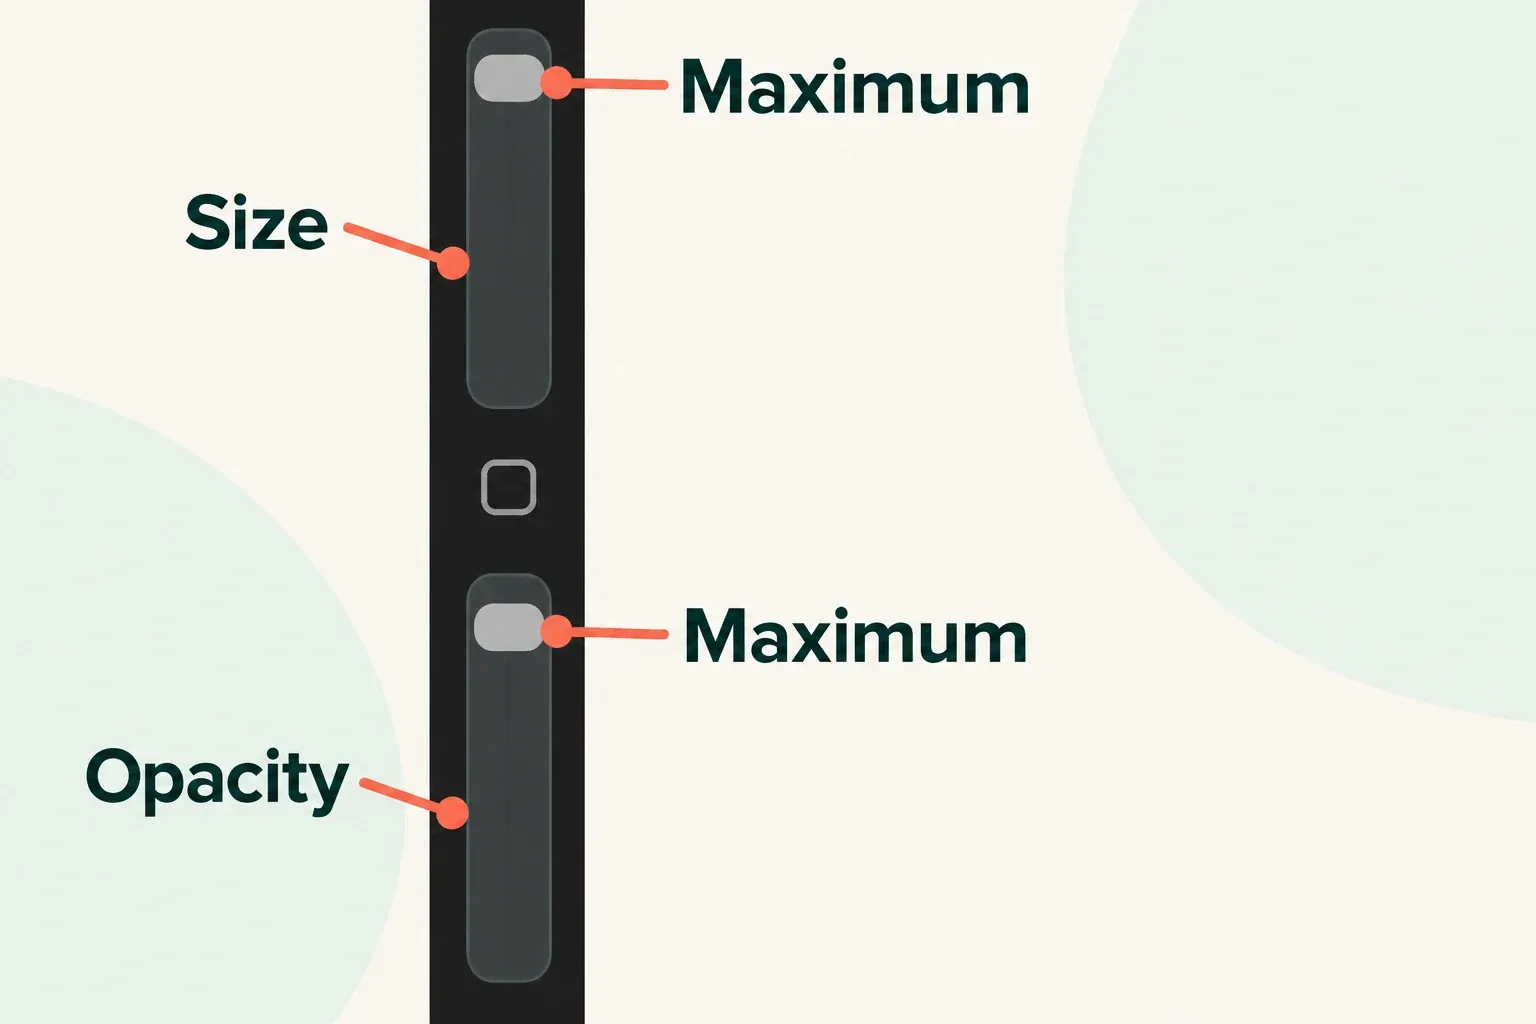
On a blank layer, compare Classic Library > Painting > Round Brush with Classic Library > Calligraphy > Monoline, the pair named in Procreate's troubleshooting guidance. In Procreate 5.4, those older sets are in the Classic Library. Use a color that contrasts with the background and set the size and opacity sidebar sliders to maximum. If Monoline draws but Round Brush remains transparent even with firm pressure, Procreate describes a possible Pencil pressure issue. Treat that as a diagnostic clue, then check the Pencil and pressure settings; Monoline is not a second pressure-response control.
Check the affected brush
When Round Brush responds to pressure but one custom brush does not, start with the affected brush's settings. I would preserve the original and work on a duplicate before changing the app curve.
- Open Brushes, find the custom brush, then swipe left on it and tap Duplicate.
- Tap the duplicate to select it, then tap it again to open Brush Studio.
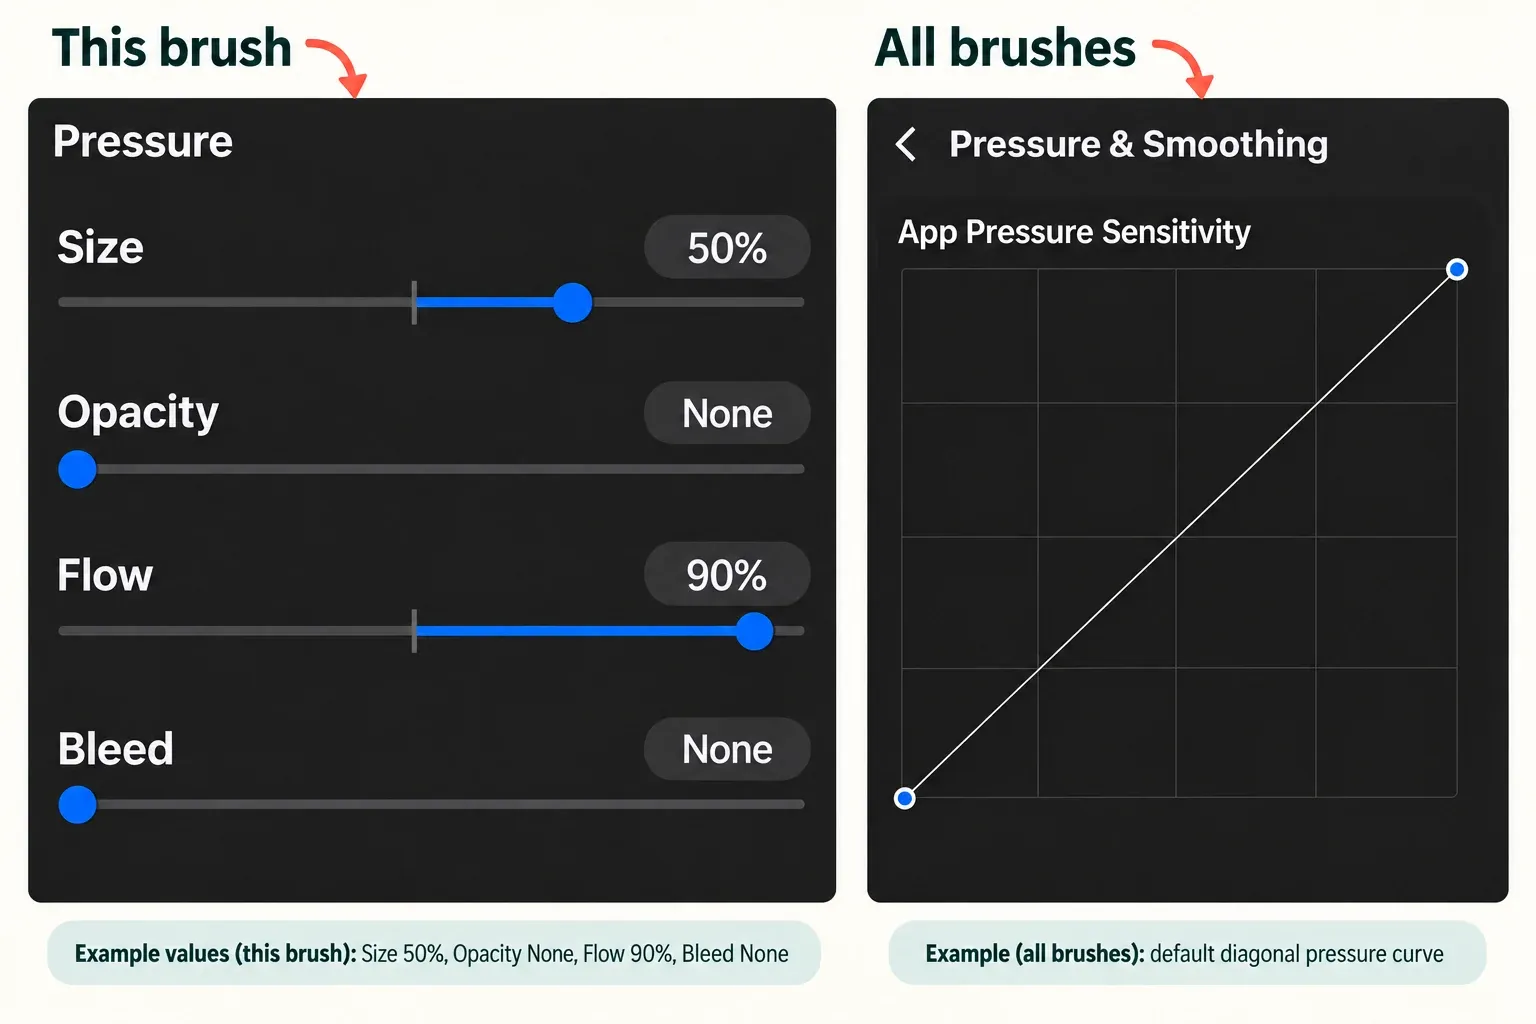
- Select Apple Pencil and inspect the pressure controls for Size, Opacity, Flow and Bleed. Record the current values before adjusting the response you actually need.
Change one control on the duplicate, tap Done at the top right to save the changes, then return to the canvas and compare the same light-to-firm stroke with Round Brush. Keep the original unchanged. A brush's pressure graph still respects the app's global Pressure & Smoothing settings, so these are two adjustment scopes sharing the same input, not independent pressure tests.
Inspect Procreate pressure settings
For the app baseline, open Actions → Prefs → Pressure and Smoothing. The App Pressure Sensitivity curve maps your pressure input to brush output; an unsuitable curve can restrict the difference between light and firm strokes. Record the current curve before changing it. Make a small adjustment and repeat the same stroke with the same brush, size, opacity and canvas. Restore the previous curve if it does not improve the response.
Keep the brush copy unchanged while checking the app curve. A curve that produces an opaque mark from minimal input can hide the symptom; it does not establish that the Pencil is supplying a usable pressure range.
Pressure, tilt, and touch are different inputs
A Pencil can still tap controls and draw a line even when the expected pressure response is absent. Tilt can also alter supported brushes independently of pressure. Judge pressure by a deliberate light-to-firm transition, not by whether the Pencil can draw at all.
Finger input does not reproduce Apple Pencil pressure. When comparing results, use the same Pencil, the same brush, and the same canvas. This keeps a gesture or brush difference from being mistaken for a hardware problem.
Escalate the check without changing several settings
If the documented Round Brush check still suggests missing pressure, compare a pressure-aware brush in an app already installed on the iPad. Similar failure across apps is a reason to inspect Pencil compatibility, connection and hardware. A failure limited to Procreate points toward app-level checks; one affected brush points toward Brush Studio. These patterns guide the next action, but success elsewhere does not prove the hardware is healthy.
If pressure still fails across apps or the Pencil cannot maintain a compatible connection, ask Apple Support to assess the Pencil and iPad combination. If the issue remains within Procreate after the documented checks, use Procreate's Support Form. A Procreate-only symptom can still involve the Pencil; neither route guarantees a diagnosis, repair or replacement.
Give support the exact Pencil and iPad models, iPadOS and Procreate versions, and whether the problem affects Round Brush, Monoline basic drawing, one custom brush or every pressure-enabled brush. Include the connection checks, other-app result and recorded brush/curve baseline, with each change and its effect. Stop making simultaneous adjustments while waiting for a diagnosis; retain your artwork and original brush.
Tune pressure for a usable range, not one perfect stroke
Once pressure responds, aim for light marks, normal drawing pressure and firm accents without an uncomfortable grip. Judge the range with a short row of hatching and a slow taper. Include a filled stroke too, rather than relying on one dramatic line. A comfortable result with one brush does not establish the response of every other brush. If the feel changes after an iPadOS or Procreate change, return to the same diagnostic brush and recorded baseline. If the feel changes after a Pencil or device change, do the same.
This is an independent guide. It is not affiliated with or endorsed by Procreate.