Find the first stage where sharpness changes
Start with the source dimensions and the actual exported file. A blurry-looking preview can come from the way a viewer scales the image, while a smaller file or an already-soft drawing needs a different fix. Record the canvas pixel dimensions, then inspect the direct PNG and any received or downloaded copies in a viewer with a documented native-pixel mode.
I would keep the artwork unchanged until that comparison is clear. The first stage where dimensions or edge detail change narrows the investigation; it does not prove which setting or service caused the change. If you have only a service preview and cannot obtain the original file, you cannot yet tell whether the uploaded original lost detail.
Blurry export diagnosis
| Observation | What it suggests | Next check |
|---|---|---|
| The source already looks soft or has too few pixels for the destination | Source detail or an earlier resize may be limiting the result | Record Canvas information dimensions; inspect earlier source artwork and any resizing decisions |
| The direct PNG looks softer only in one viewer | A scaled display may explain the appearance | Inspect the actual PNG in a documented native-pixel mode; do not assume Procreate canvas zoom is an equivalent reference |
| A received file has fewer pixels or a different edge than the direct PNG | The transfer stage is a candidate for the change | Confirm you have the received file itself, compare dimensions and the same edge, then check that route's current options |
| Only the service preview looks soft | The preview may be a scaled or separate derivative | Download the original if the service offers it. If it does not, leave the original-file comparison unconfirmed |
Record the source canvas dimensions
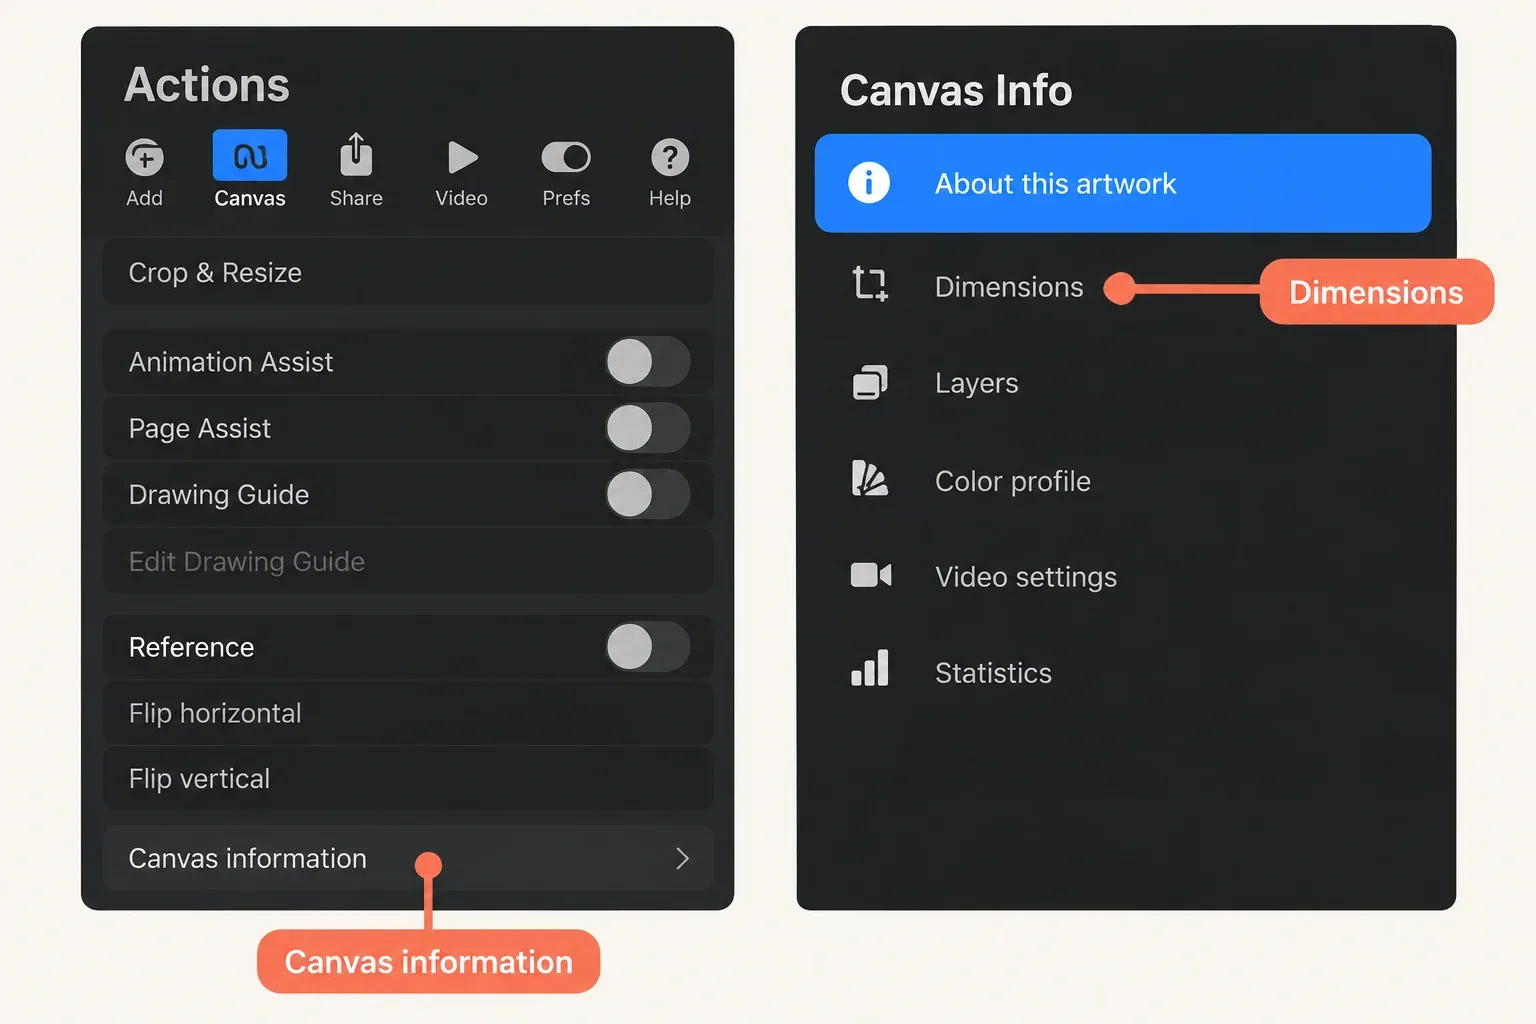
In Procreate, open Actions > Canvas > Canvas information > Dimensions. Write down Pixel width and Pixel height for the artwork you are exporting. These fields describe the source canvas. They are not a measurement of a later transferred file or marketplace copy.
Do this before changing the DPI label, enlarging the canvas, or trying a new format. A later resize would replace the baseline you are trying to investigate. If the drawing began as an imported image, check its earlier original too: the current canvas size cannot tell you how much detail that image contained before insertion or resizing.
Keep a direct PNG as the file baseline
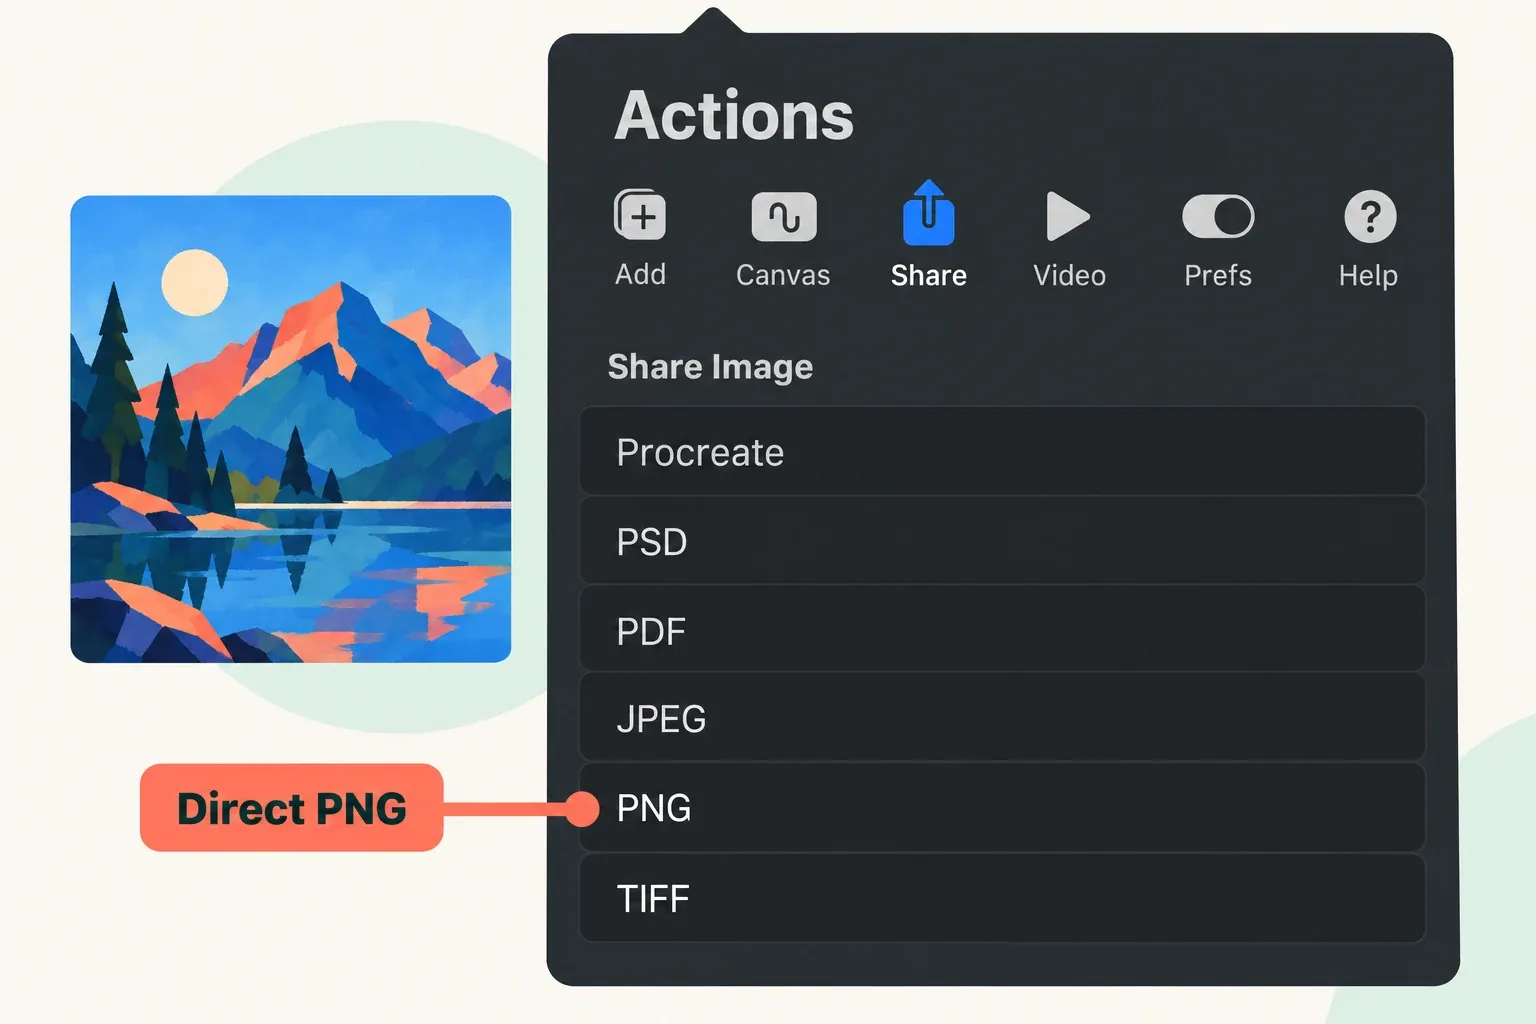
Choose Actions > Share > PNG, then Save to Files in the iPadOS Share sheet. Keep that saved file as the direct-export baseline, with a name that distinguishes it from received or downloaded copies. Procreate describes PNG as lossless and flattened, with transparency support. That describes the format; it does not guarantee that every later sharing or upload route preserves the file.
Inspect this PNG before changing the artwork. If the destination requires JPEG, compare a JPEG export separately after the PNG baseline is understood. JPEG uses lossy compression, so matching width and height would not make it equivalent to the PNG.
Inspect the actual files at a documented scale
If you already have Photoshop on a desktop, use it for both the dimension check and the edge comparison:
- Open the actual direct PNG. Choose Image > Image Size and read Dimensions, which shows pixel width × height. Record those values without changing settings or applying a resize, then close the dialog.
- Choose View > 100%. Adobe defines this view as one image pixel per monitor pixel. Inspect a recognizable edge with fine detail, such as a leaf contour or a diagonal line.
- Open each actual received or downloaded file in turn. Repeat the Dimensions check and View > 100%, and compare that same edge in the same viewer. Do not resize, re-export, or resave the files for this inspection.
Use the actual files rather than importing them into another Procreate canvas or making new exports for comparison. An import, resize, or extra export adds another stage. Keep the source canvas dimensions as their own record; this procedure does not claim a matching 100% view on the iPad canvas.
In another app, use its documented controls for both file pixel dimensions and a native-pixel or actual-pixels view. Fit-to-window and a pinch zoom with no known scale are not substitutes. If the app cannot provide those checks, record dimension or pixel inspection as unconfirmed instead of diagnosing export damage from its preview.
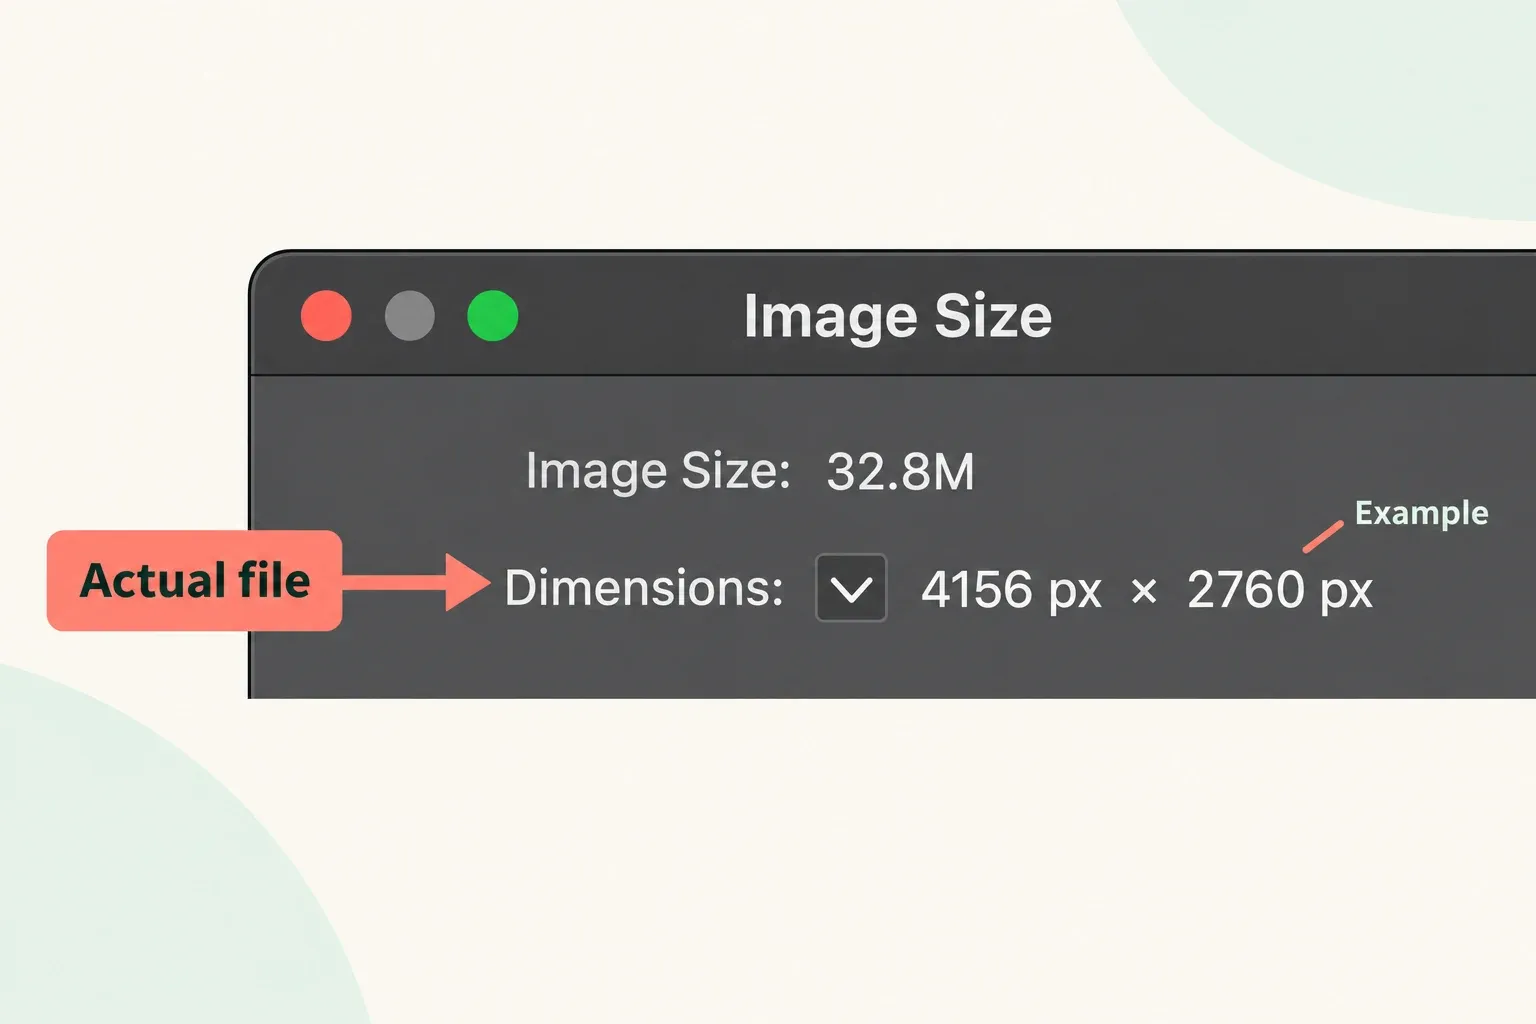
Fewer pixels establish that dimensions changed somewhere between two checkpoints. Equal dimensions establish only that the width and height match; they do not prove identical pixels or unchanged compression. Compare the edge as well, and keep track of which file you actually opened.
Separate a received original from a service preview
For a transfer, compare the direct PNG with the file the recipient actually received. For an upload, distinguish the service's on-page preview from a download explicitly offered as the original. A thumbnail or display-sized download is a derivative checkpoint, even if it shows the same artwork.
If an original download is available, inspect it with the same dimension and native-pixel procedure. If its dimensions and that edge remain unchanged while the preview looks soft, the evidence points toward the preview display. If the received or downloaded file has fewer pixels, or the same edge has visibly changed in the same viewer, investigate that stage's current resize, compression, or download options. These are candidate explanations, not a claim that the service always changes images.
If you cannot obtain an original, stop the original-file diagnosis at that point. You can report that the preview looks soft, but you cannot infer the stored original's quality from it. Check the destination's current file requirements or ask the recipient for the actual received file before changing the source artwork.
When trying another transfer route, select an option documented to send the file or original, then inspect the received copy again. The route's name alone does not confirm preservation. Save to Files gives you a local baseline; it does not certify what a later messaging app or service will deliver.
Calculate whether the source contains enough pixels
For screen delivery, compare the actual file dimensions with the destination's required pixel dimensions and largest intended display size. Enlarging a 1200-pixel-wide image into a 2400-pixel-wide placement does not recover detail that the smaller source never contained. Procreate's explanation of interpolation describes how new pixels are estimated from existing ones.
For print, calculate resolution from the pixels and final print size: width in pixels ÷ width in inches, and height in pixels ÷ height in inches. The lower result is the limiting direction. For example, 2400 × 3000 pixels placed at 8 × 10 inches gives 300 PPI on both axes. That is a calculation, not a promise of print quality.
Use the chosen printer's target for the specific product. Printful's file guidelines distinguish products and printing techniques, and VistaPrint relates poster resolution to viewing distance and intended use. Those conditions do not establish one universal minimum for every artwork. Screen inspection also does not replace a physical print proof.
Fix the source only after locating the limitation
If the source lacks enough pixels or already contains a soft edge, look for an earlier, larger original before enlarging the current image. Procreate documents that changing DPI alone changes physical size without adding pixels. Raising that label will not repair missing line detail.
If resizing is required for delivery, preserve the original artwork and work on a separate copy. Procreate's Crop and Resize resampling uses bicubic interpolation; Transform has its own Nearest Neighbor, Bilinear, and Bicubic choices. The two controls serve different operations. Resampling can satisfy a dimension requirement, but inspect the result rather than treating a larger pixel count as recovered detail.
Procreate warns that repeated transformations can degrade raster edges. Keep an original layer available while deciding final scale and placement. If the direct PNG is sound and the first observed change is later in the chain, address that handoff before adding another resize to the source.
For pixel art or a game texture, preserve the asset dimensions required by the actual pipeline. A softened enlarged preview is not enough reason to upscale the asset. First verify the actual exported and received dimensions, then consult the destination's documentation for its display or filtering behavior. Engine-specific configuration is a separate task.
Keep a short delivery record: source dimensions, direct PNG dimensions, each received or downloaded file, the viewer and scale used, and the first observed difference. That gives the next correction a defined target. If the limitation is insufficient source pixels for print, the canvas-size guide explains how to plan the next artwork for its destination.
This is an independent guide. It is not affiliated with or endorsed by Procreate.