Convert the final print size into pixels
Plan a Procreate print canvas from the printer's finished dimensions and requested PPI. Multiply width in inches by PPI for pixel width, and height in inches by PPI for pixel height. For example, 8 × 10 inches at 300 PPI requires 2400 × 3000 pixels before any required bleed is added.
Collect the print specification
Find the required width, height, units, bleed, resolution, file type, and color profile for the exact printer or product. A greeting card and an art print can use different dimensions even when their advertised size sounds similar. So can a shirt template. Keep the current specification beside the artwork while setting up the canvas.
Convert inches to pixels
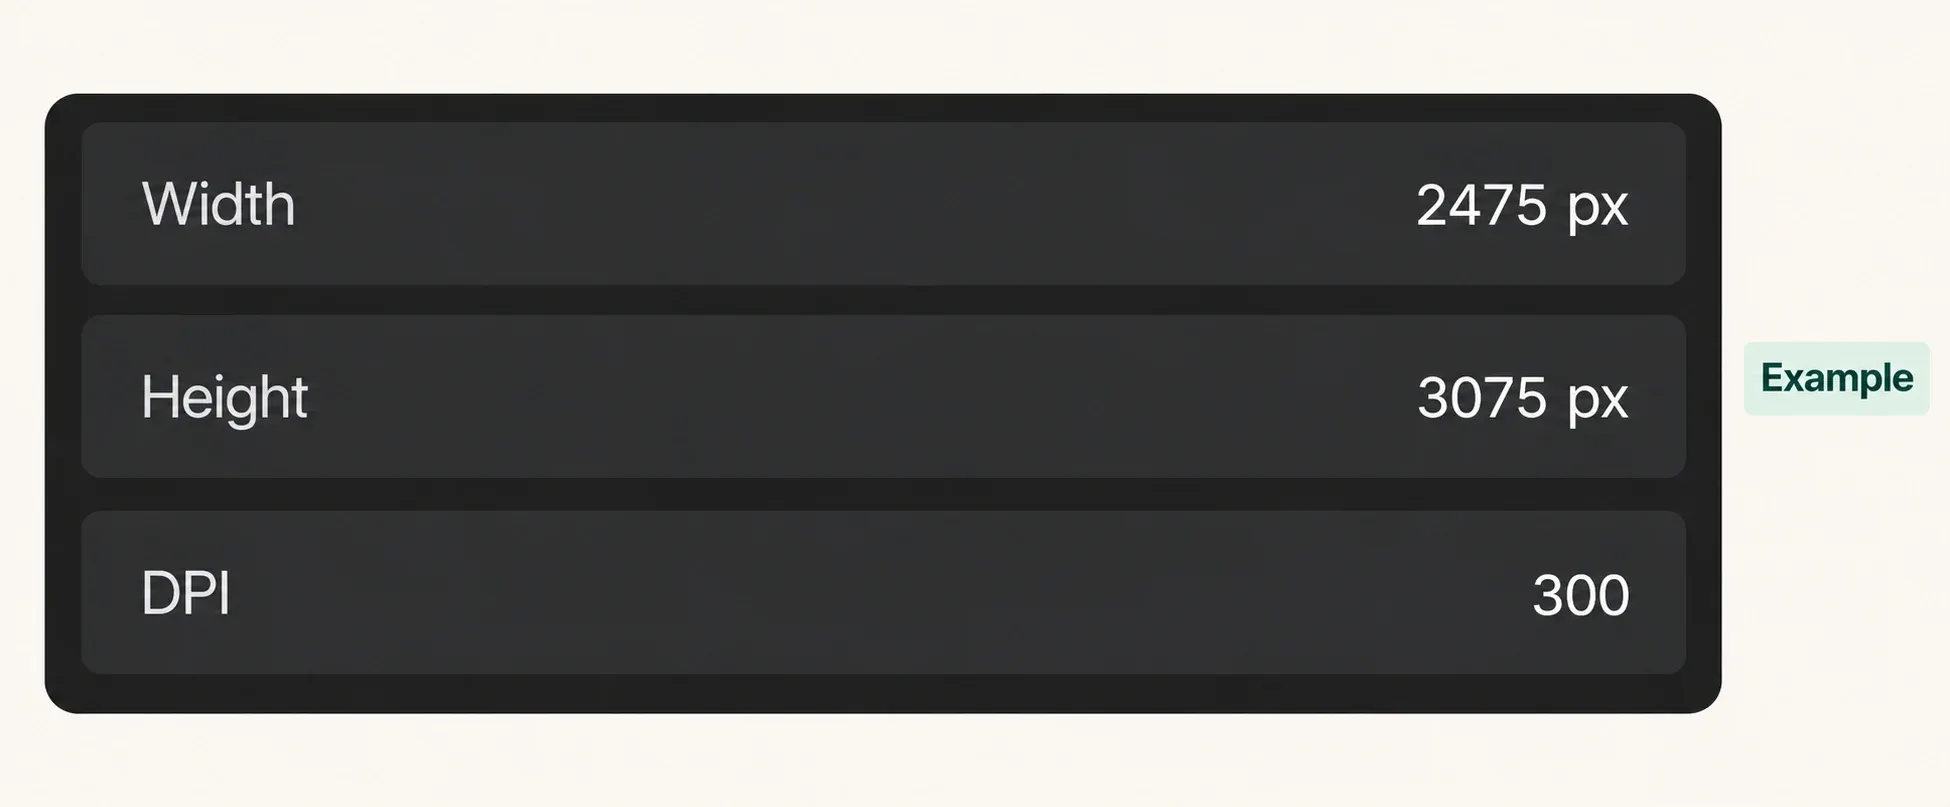
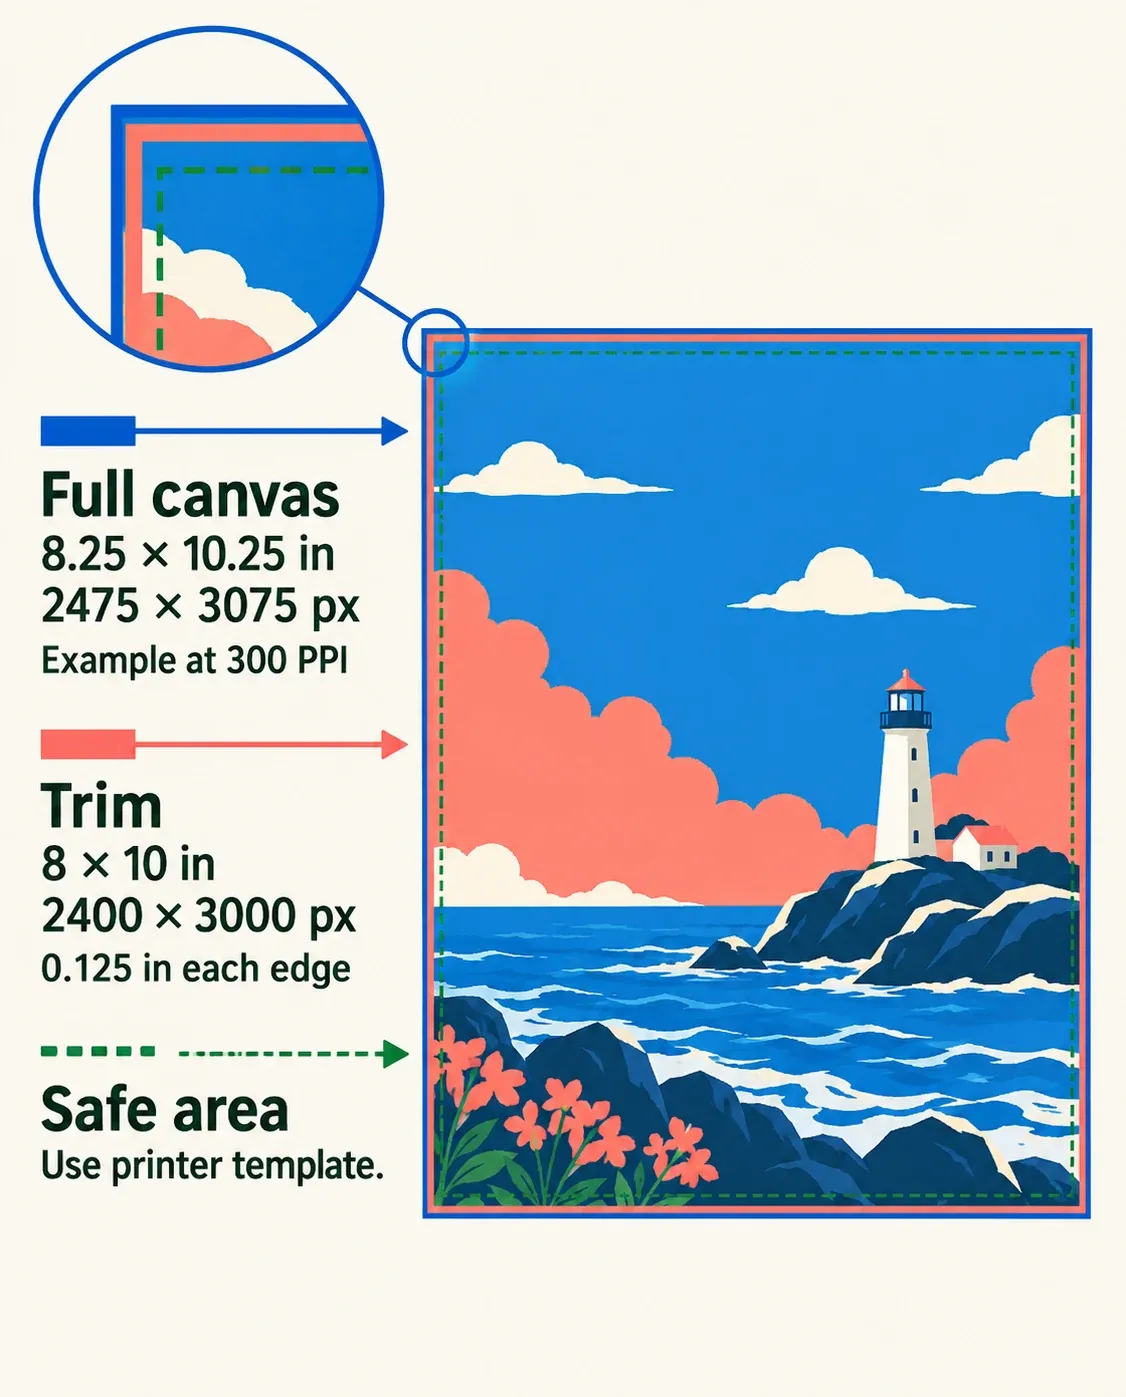
Multiply each physical dimension by the requested PPI. For the 8 × 10 inch example, if the printer requires 0.125 inch bleed on every edge, the full canvas becomes 8.25 × 10.25 inches, or 2475 × 3075 pixels at 300 PPI. Keep important content inside the printer's safe area, not in the bleed.
Create the canvas in Procreate
From Gallery, tap +, then the rectangle-with-plus icon in the New Canvas menu to open Custom Canvas.
- Choose Dimensions. Tap Width or Height to open the numeric keypad, select Pixels as the unit, and enter the calculated full-canvas width and height. For the conditional bleed example above, enter 2475 and 3075.
- Set DPI to the printer’s requested PPI; the example uses 300. Check Maximum Layers before committing to the canvas. Larger pixel dimensions leave fewer layers available, so confirm that the document can accommodate the layers you need.
- Open Color Profile. Choose the printer’s requested RGB or CMYK color space and the exact profile within it. If the printer supplies a custom profile, use Import to add that profile rather than choosing one merely because its name sounds suitable.
- Review the dimensions, DPI, and profile, then tap Create at the top right.
Choose the color space before drawing. Procreate lets you change profiles within the artwork’s existing RGB or CMYK space, but cannot switch that artwork from RGB to CMYK or vice versa. If the destination requirement is unclear, resolve it before investing in the drawing.
Match the aspect ratio
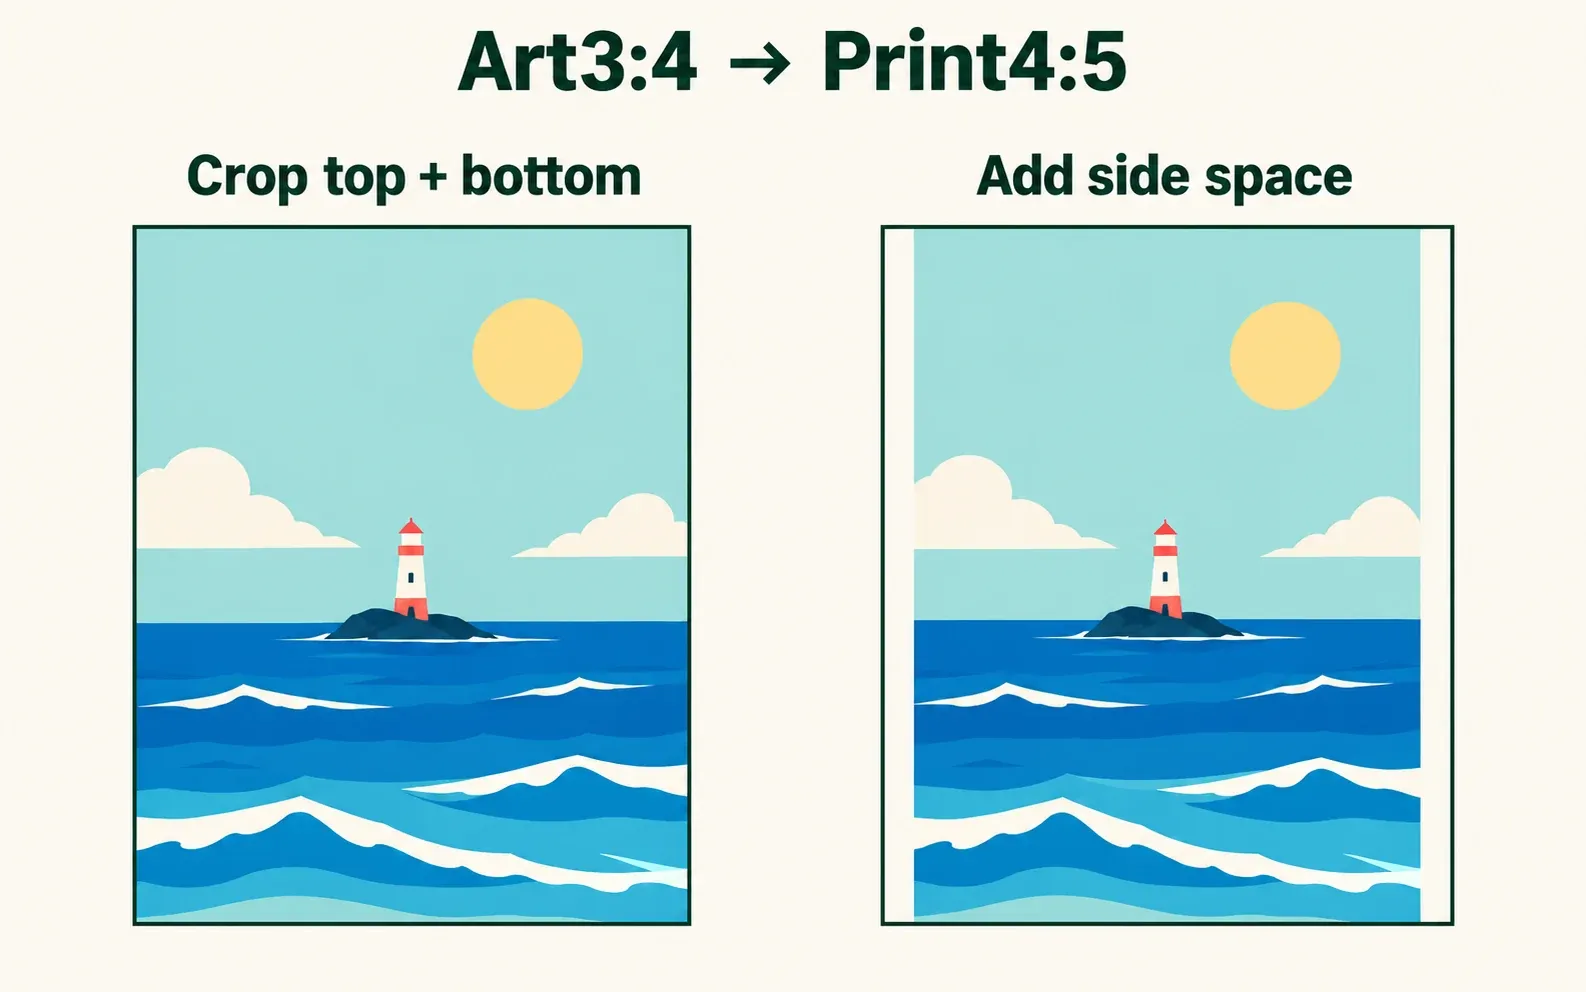
An 8 × 10 finished print uses a 4:5 ratio: divide both dimensions by 2. A 3:4 composition cannot fill that trim area at its existing ratio without cropping or adding space. Decide which outcome is acceptable before detailing the edges. When the canvas includes bleed, its outer dimensions have their own ratio; compare the composition with the trim area and the full file with the printer’s full template dimensions.
Use the requested profile
Color profile requirements come from the destination. Printful currently recommends sRGB IEC61966-2.1 for its workflow, while another printer may supply a different instruction or conversion process. Keep the original Procreate file and make destination-specific exports from that source.
Common print canvas examples at 300 PPI
| Finished size | Aspect ratio | Pixel dimensions before bleed |
|---|---|---|
| 5 × 7 in | 5:7 | 1500 × 2100 px |
| 8 × 10 in | 4:5 | 2400 × 3000 px |
| 8.5 × 11 in | 17:22 | 2550 × 3300 px |
| 12 × 18 in | 2:3 | 3600 × 5400 px |
Pixels and inches are linked by PPI
Pixel dimensions describe how many samples exist in the file. Inches describe the intended physical size. PPI connects those two values for a planned print. Changing DPI alone alters physical dimensions without changing the pixel count.
Use the printer’s current specification rather than a universal 300 PPI rule. Printful explains that its recommended resolution depends on the product and printing technique. For posters, VistaPrint also identifies viewing distance as a factor in the resolution choice. Ask the receiving printer for the target that applies to this job; distance alone is not permission to lower it.
Add bleed, trim, and safe area before composing
The finished print size is the trim size. MOO explains bleed as artwork outside the trim line and the safe area as the protected region inside it. The background extends into bleed so small cutting inaccuracies do not expose an unprinted edge. Add the chosen printer’s bleed to both sides of each dimension before converting inches to pixels. Keep text, faces, borders, and other critical details inside its stated safe area; use expendable background in the bleed.
Use the printer’s current template to mark bleed, trim, and safe boundaries. MOO warns that borders can look lopsided or uneven after cutting; ask your printer about its tolerance before placing a thin border close to trim. Follow that printer’s allowances rather than borrowing another product’s margin. Hide template guides before export and compare the final dimensions with the current specification.
Evaluate an existing canvas before upscaling
Before changing an existing canvas, open Actions → Canvas → Canvas information → Dimensions and read Pixel width and Pixel height. Divide each by the intended inches on that axis. If the entire pixel grid includes bleed, use the full outer dimensions, including bleed, for this calculation. The lower result is the limiting effective PPI. For example, 2400 × 3000 pixels can cover 8 × 10 inches at 300 PPI before bleed; the same full grid does not also supply that resolution over an 8.25 × 10.25 inch file.
Compare the result with the printer’s requested resolution, then check the composition at the intended trim ratio. If the source is undersized, consider a smaller print or return to a larger original. Upscaling estimates new pixels from the existing artwork; it cannot recover detail that was never in the source. Preserve the layered master before making any delivery changes.
If you already use Photoshop on a desktop, open the actual exported file and choose View → 100%, or Actual Pixels in the Zoom tool options, to inspect fine lines, lettering, grain, and hard edges. Compare files at the same pixel scale without resizing or re-exporting them during the check. In another viewer, use its documented actual-pixels mode; if none is available, leave pixel-detail inspection unconfirmed.
A digital layout or pixel check cannot establish the finished color on the chosen material: screens use light while prints use ink on physical materials. For important work, use the printer’s physical proof or sample process to judge the printed result.
If the printer offers a template or preflight report, compare its reported size and resolution with your calculation. Save that report or approval with the exported file. A documented preflight prevents a later reprint from depending on remembered settings after the canvas or product specification has changed.
This is an independent guide. It is not affiliated with or endorsed by Procreate.
If the print file needs a clear background, check the exported PNG's transparency before sending it to the printer.