A full layer stack does not mean you must shrink your finished artwork. First protect a native copy, then merge only the layers you no longer need to edit separately. Reduce the canvas dimensions only when the smaller image still meets the delivery requirement.
The limit belongs to the canvas and device combination. Procreate bases it on the iPad's RAM and the canvas's pixel dimensions. There is no single useful layer count for every iPad, and unused storage is not the same resource as RAM.
Find the limit for this canvas
Open Actions → Canvas → Canvas information → Layers to inspect the current artwork's capacity. For a new project, enter the intended width and height in the custom canvas setup and check its maximum layers before creating it. The Canvas information controls are the right starting point for an existing file; a layer count copied from another artist's iPad is not.
Maximum layers is the canvas's ceiling, Layers used is the occupied count, and Layers available is the room left. Merging can reduce Layers used and increase Layers available; it does not raise Maximum layers.
If you are planning a purchase or drawing on a different iPad, use Procreate's device-and-canvas calculator with that exact model and output size. Keep the dimensions in pixels for screen work, or enter physical dimensions and the required print resolution for a print project.
Changing DPI alone does not create more layer capacity
A 3,000 × 3,000-pixel canvas remains that many pixels when you change only its DPI metadata. Procreate explicitly says that altering DPI later can leave the layer count unchanged. The apparent gain from choosing a lower DPI for a fixed size in inches comes from creating fewer pixels, which is a different decision.
I would keep the required pixel dimensions and look for finished layers to consolidate first. Reducing width or height can create capacity, but it can also discard the detail you need for print or a large display. Include the printer's bleed requirement before deciding that a smaller canvas is sufficient.
Make a recoverable checkpoint before merging
- Return to Gallery, swipe the artwork thumbnail to the left and tap Duplicate. Tap the title beneath each thumbnail to name the master and working copy so you can distinguish them.
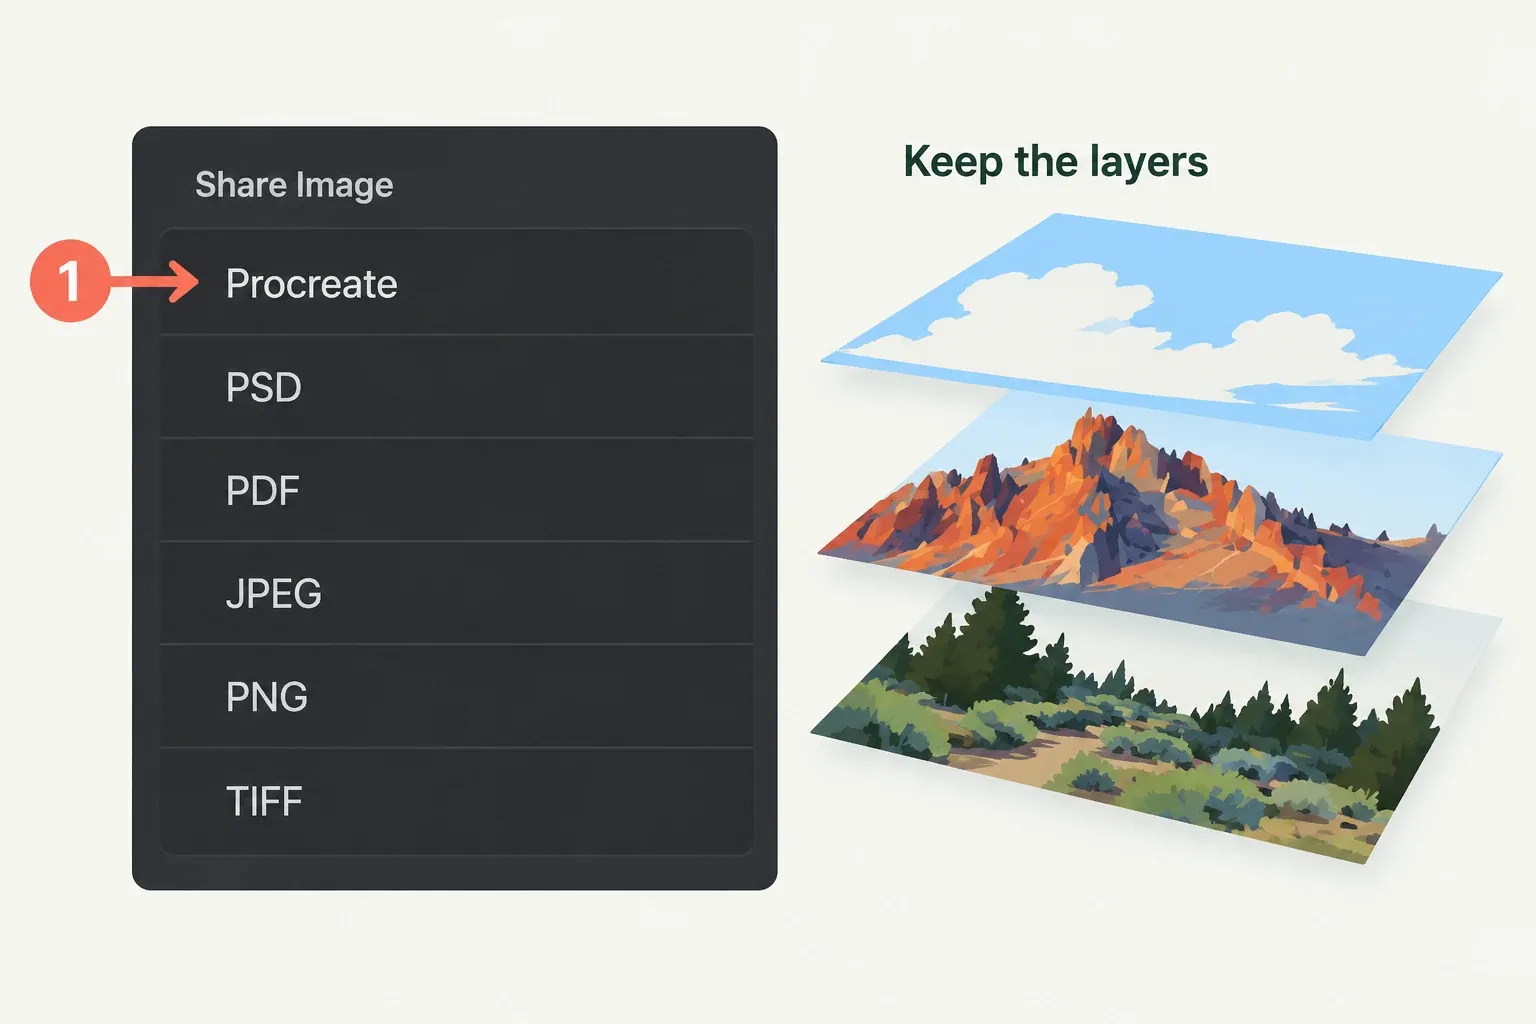
- Open the master and export a separate native copy through Actions → Share → Procreate. Choose Save to Files in the iPadOS sharing sheet and select your backup destination. Keep this export separate from the working copy you will consolidate.
- Return to Gallery and tap Import at the top right to open Files. Navigate to the backup folder and tap the exported .procreate file to import it as a new canvas. Open that imported copy and inspect its layers, masks and important artwork. If it will not open or is the wrong version of the artwork, stop before merging.
The native Procreate format preserves editable artwork data. A PNG or JPEG is a delivery image, not a substitute for the layered source.
Merge stable artwork in the working copy
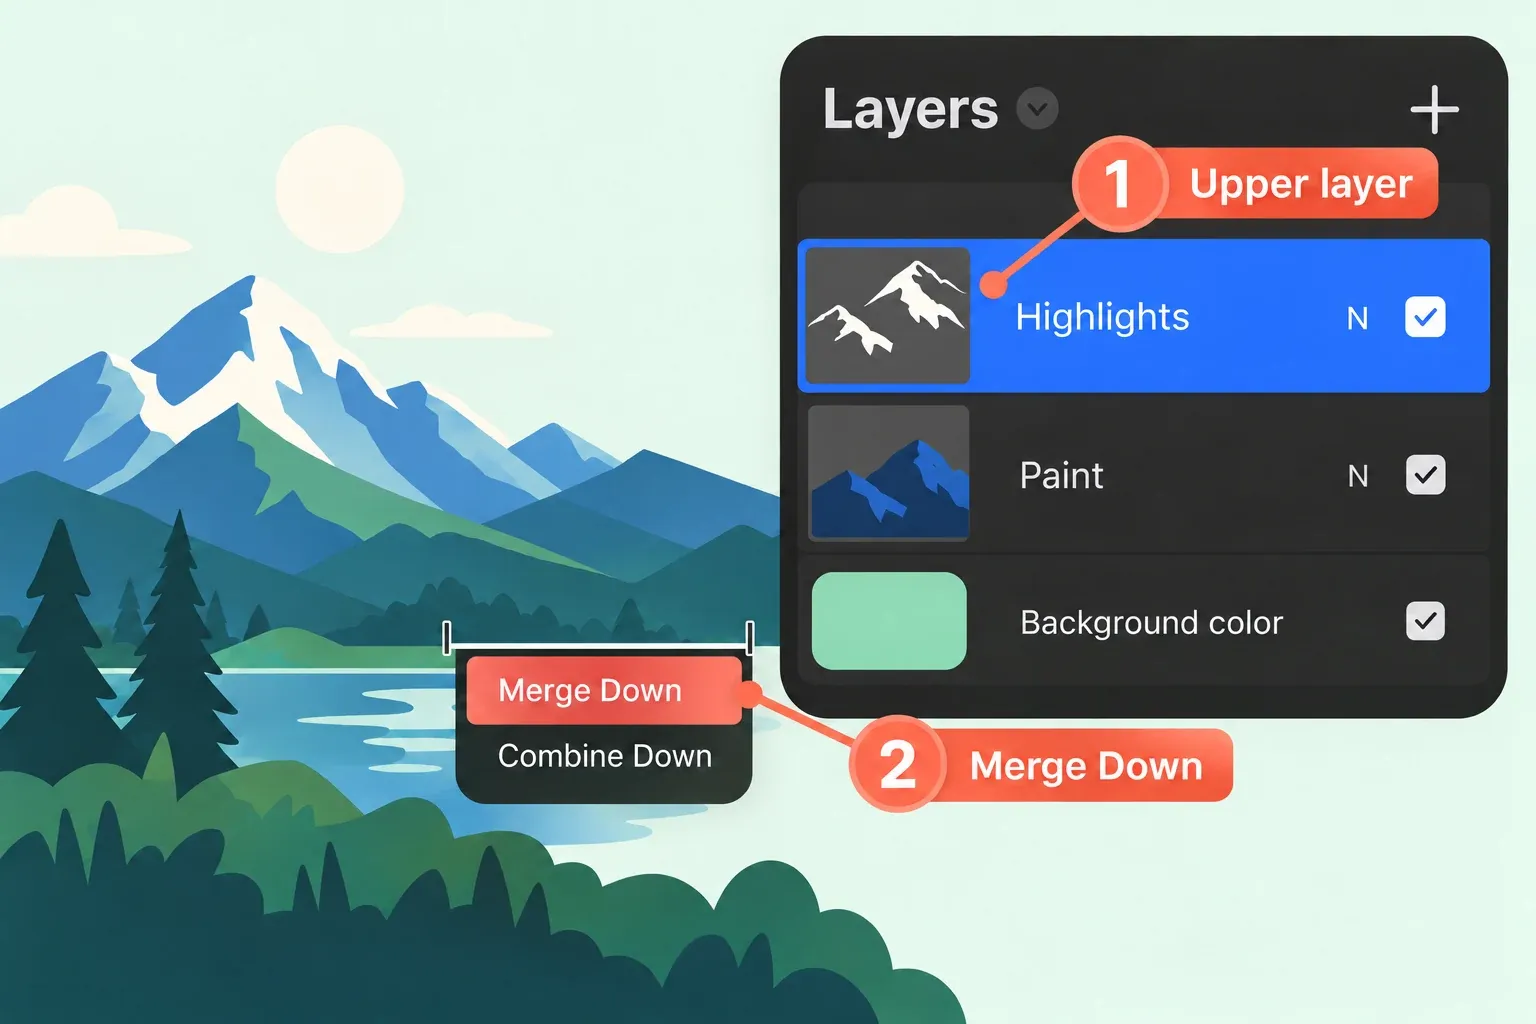
Choose a pair whose colors, position and relationship are already approved. Open Layers in the protected working copy, tap the upper layer once to select it, then tap it again to open Layer Options and choose Merge Down. This combines it with the layer directly below. Compare the appearance with the master before continuing, then recheck Layers used and Layers available in Canvas information.
Merge Down bakes the blending effect into the pixels below and disregards Alpha Lock, as described in the same layer controls. Check shadows, highlights and edges after each merge. Combine Down creates a group instead; it keeps the members separate and does not perform the same consolidation.
Keep masks, line art, alternate colors and clipped paint separate while those edits may still change. Merging trades independent control for fewer occupied slots. An immediate Undo can reverse a fresh operation; it does not replace the saved checkpoint you may need after closing the canvas.
Grouping is not merging. A group organizes its members while retaining their layers. Putting the stack into a folder does not create the empty slots that consolidation does. Check the layer count after your chosen change and name the merged layer by purpose.
| Choice | When it makes sense | What you give up |
|---|---|---|
| Merge finished layers in a copy | Their separate edits are approved | Independent adjustment of those components |
| Use fewer canvas pixels | The smaller result still meets the output specification | Resolution available for later delivery |
| Split stable components into documents | Background, subject or effects can be revised independently | The convenience of one synchronized stack |
Use fewer pixels only when the output allows it
If the delivery can accept a smaller image, make another working duplicate and use Actions → Canvas → Crop and Resize, then open Settings. Switch Resample canvas on to scale the artwork with the canvas. Reducing the crop boundary with resampling off changes the canvas area instead and can cut away part of the composition. These are different compromises.
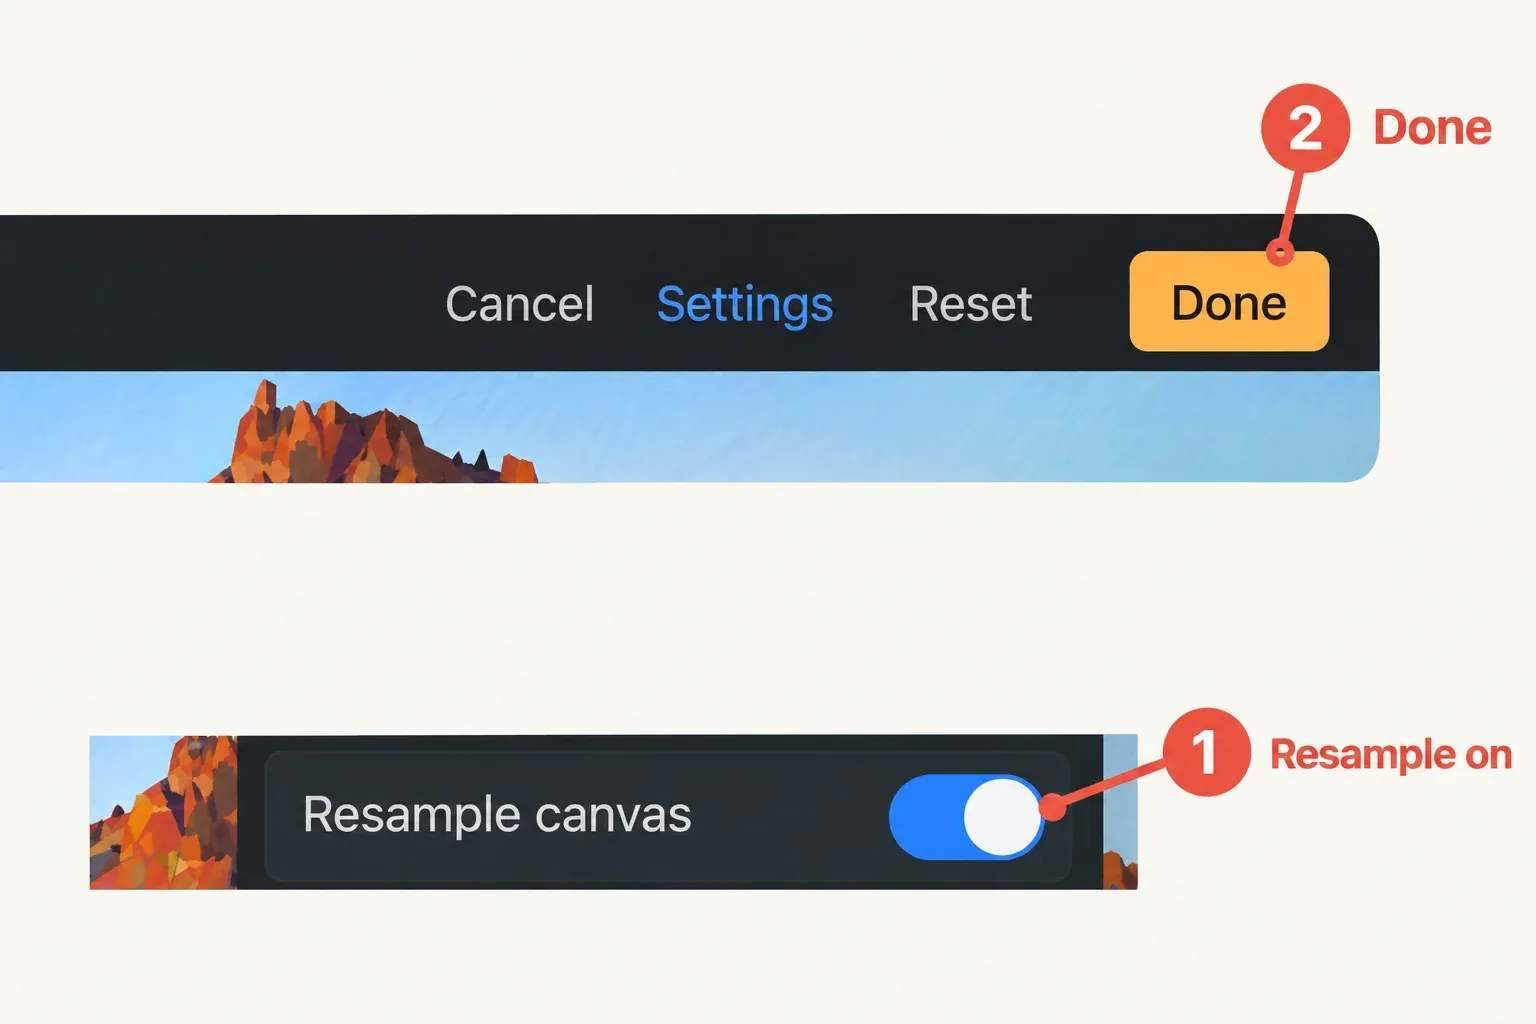
With Resample on, Aspect Lock engages automatically. Enter smaller numerical dimensions in the width or height readout; those readouts use the units chosen when the canvas was created. Tap Done to apply the resize, then check Canvas information → Dimensions for the resulting Pixel width and Pixel height. Recheck the layer capacity and inspect the resized artwork against the delivery requirement. Keep the larger master. The smaller copy offers less resolution for later delivery, and enlarging it again does not restore the original detail.
Split documents only when their boundaries are stable
A background and subject can live in separate documents; an effects pass can be separate too. Give them the same pixel dimensions, color profile and placement reference. Keep the native source for each component and export transparent delivery copies at the full canvas size. Scaling a cropped component back by eye adds an avoidable alignment problem.
The hard part is coordination. Changing a silhouette can invalidate a shadow or mask in another document. Decide which source owns each edge and use versioned exports. Tightly connected paint and lighting are usually easier to manage together, so I would split them only when the benefit is clear.
Before delivery, replace the old component exports with the current versions in a fresh composite. Check alignment, transparency, dimensions and visual balance against the approved reference. This is a check for you to perform on your own file, not a guarantee that a cross-document handoff preserves every editable relationship.
Keep the edits you still need
The best layer to merge is one you are done revising. If an edit depends on changing the base shape, replacing a shadow or revealing hidden detail later, use the mask comparison to identify which relationship must remain editable. Preserve that relationship in the master even when the delivery copy becomes flat.