
In Procreate for iPad, onion skinning in Animation Assist shows nearby drawings as translucent guides around the current frame. To make those guides easier to read, change the Onion Skin Frames count and Onion Skin Opacity in Animation Assist's Settings. The current frame normally remains solid while neighboring frames fade with distance.
Turn on Animation Assist and locate the current frame
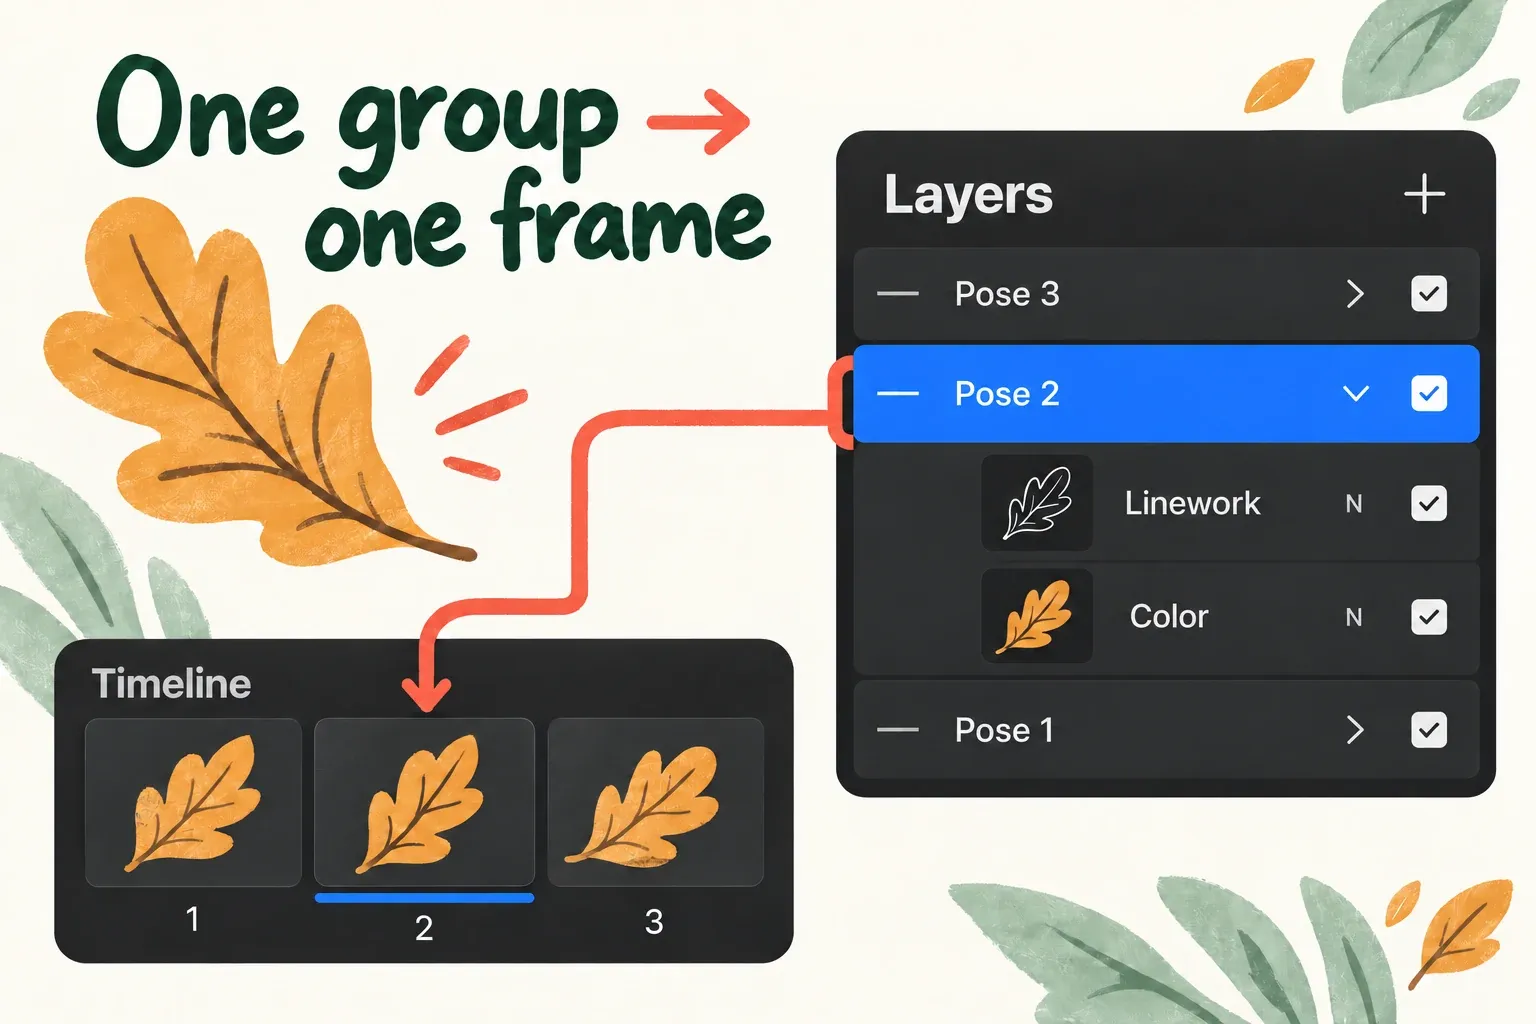
Open a drawing that you can use for an animation exercise. Tap Actions > Canvas > Animation Assist to enable the timeline. Existing layers become frames, and a grouped set of layers is treated as one frame in that timeline. The selected frame is underlined in blue, and changes on the canvas affect that selected frame.
Before drawing, tap two adjacent frames in the timeline and confirm which pose is current. Onion skins are reference images. They aren't extra marks you added to the selected layer. If several poses seem to sit on top of one another, first check the selected frame and the layer structure. When the layers of one pose should appear as one frame rather than as successive poses, keep them in a single group.
Reduce visual noise before changing the drawing
Tap Settings on the right side of the Animation Assist toolbar. Lower Onion Skin Frames if too many neighboring poses compete with the one you're editing. Onion Skin Frames ranges from None to 12 neighboring frames. Lower Onion Skin Opacity when their outlines are too strong. Its range runs from 0% to 100%. If no onion skins appear, check that Frames is above None and Opacity is above 0%. Then confirm the blue-underlined current frame and that neighboring frames contain drawings. A one-frame sequence has no neighboring pose to display, and increasing the count can't create one.
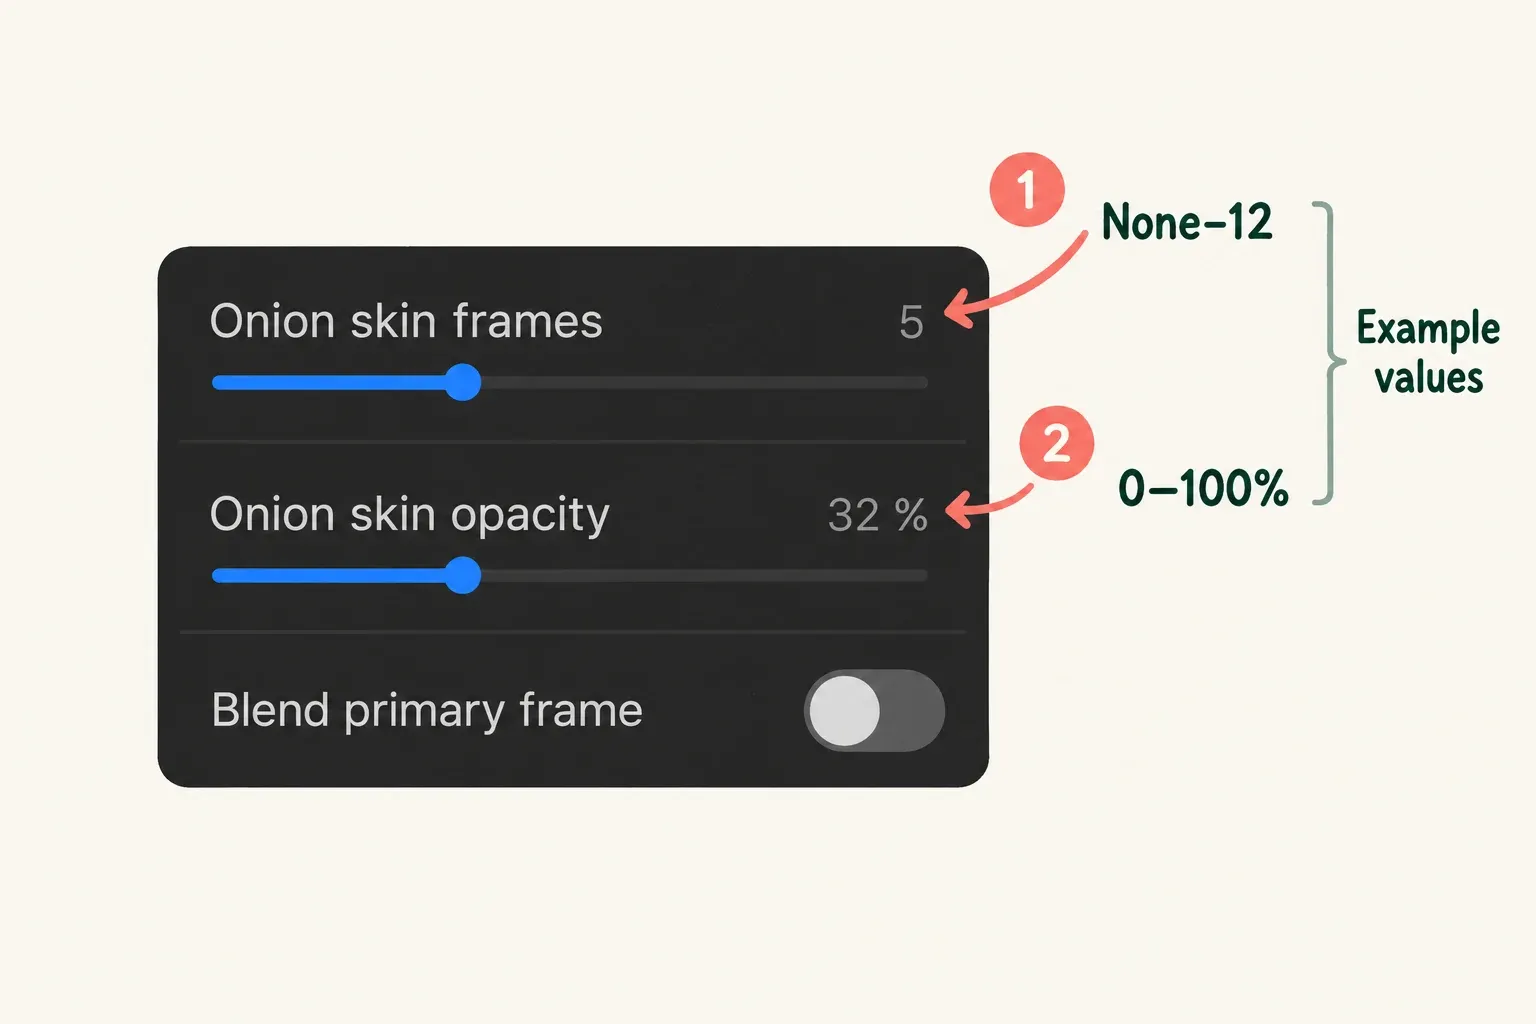
Keep the current drawing easy to distinguish. Blend Primary Frame changes the default solid appearance of that current frame to a more transparent look. I'd leave it off while you're learning which lines belong to the frame you can edit. Turn it on only when that blended comparison helps the particular motion you're drawing.
Check three already drawn leaf poses
Use a small practice drawing that already contains three different leaf poses, one pose on each layer or in each pose group. Check that the timeline shows those three drawings in the intended order: frames run chronologically from left to right.
- In Settings, keep Onion Skin Frames above None and high enough to include the neighboring drawings you want to compare. Keep Onion Skin Opacity above 0% so the guides are visible, and leave Blend Primary Frame off. This example uses the default red and green guide colors.
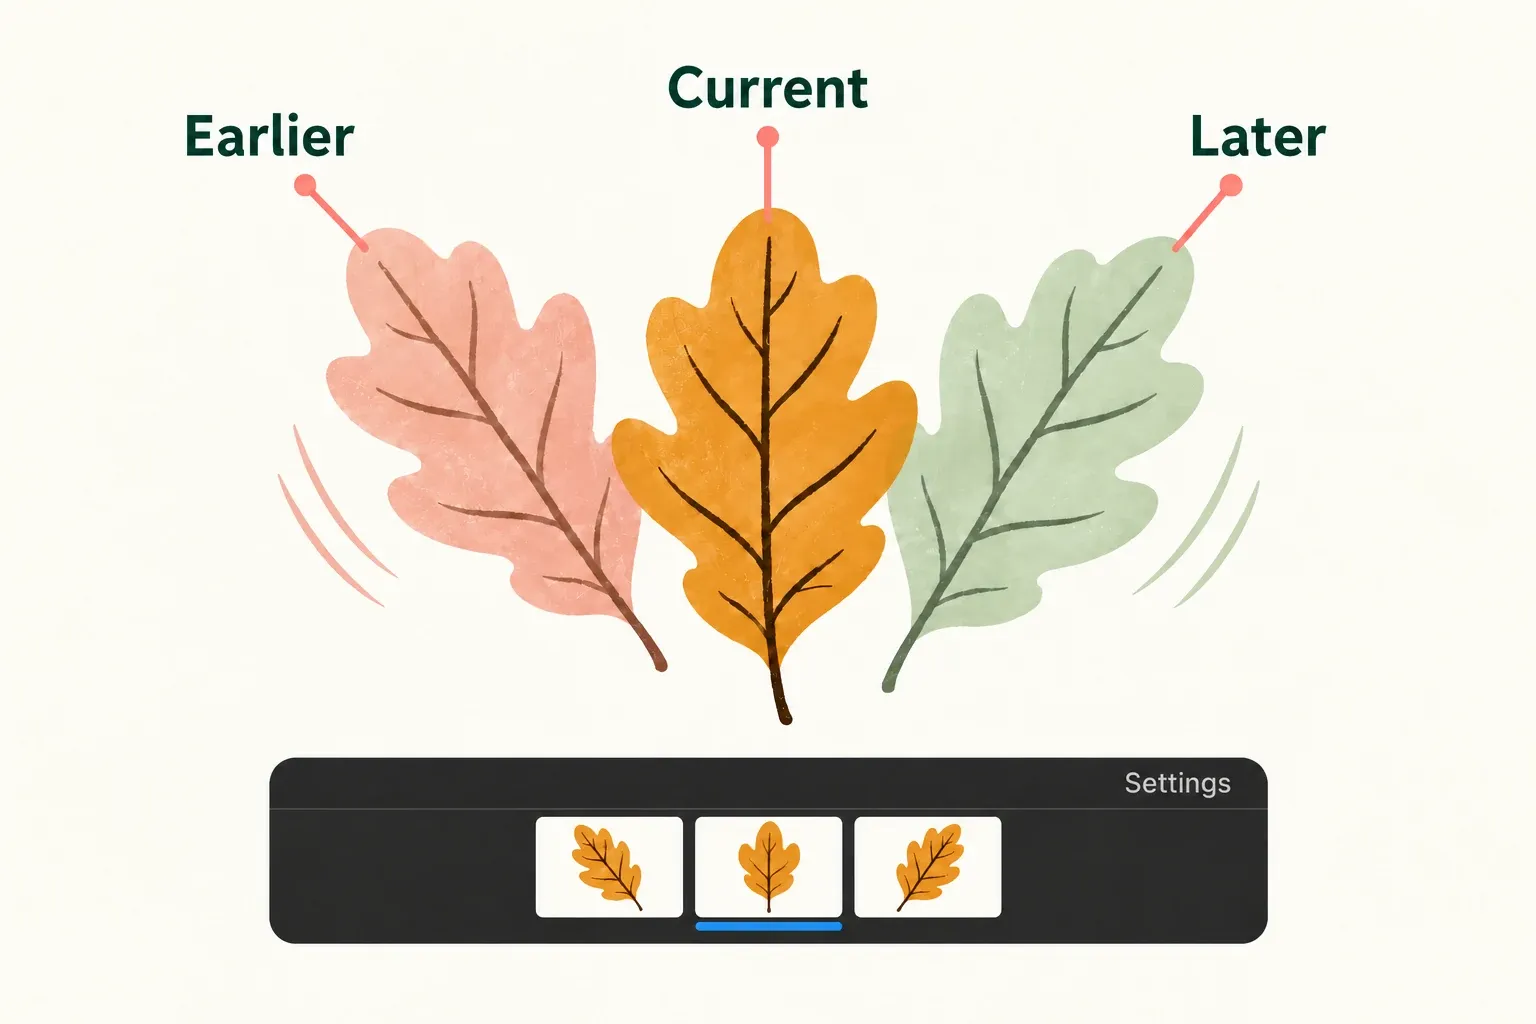
- Tap the middle thumbnail. Confirm the blue underline beneath it and find the solid current leaf on the canvas. That selected pose is the drawing you can edit.
- Find the earlier pose as a red guide and the later pose as a green guide. Adjust count and opacity until the two neighbors are easy to distinguish from the solid current leaf; there is no single preferred value for every drawing.
- Tap the first thumbnail, then the last, checking the blue underline each time. At the first frame, inspect the later drawings actually present; at the last, inspect the earlier ones. Look only for guides from available neighboring drawings. Increasing the count cannot create a pose beyond an end of this three-drawing sequence.
In the picture, all three timeline thumbnails show ochre leaf artwork. The red and green leaves on the canvas are guide colors applied to the neighboring poses. The timeline sits over the lower canvas, and the middle blue-underlined thumbnail identifies the solid leaf you're editing.
Read the colors as time direction
By default, frames ahead of the current one appear in green and frames behind it in red. Those are guide colors for neighboring frames, not a judgment about whether a drawing is correct. If the colors are difficult to distinguish against your artwork, use Onion Skins Colors in Settings to choose alternatives for the front and back frames.
Move one frame forward and back to check that the guide changes in the direction you expect. Then tap Play to preview the sequence. If the motion itself feels too fast or slow, I'd inspect Frames Per Second or add in-between drawings rather than only changing onion-skin opacity. The frame-rate range is 1 to 60 frames per second. Choose it for the intended motion. It isn't the setting that fixes invisible onion skins.
Use a small disposable animation to confirm the settings in your installed app before changing a larger piece.