Keep transparency in the exported file
To export a transparent PNG from Procreate, hide the Background color layer, check that no other visible layer contains a solid backdrop, choose Actions, Share, PNG, and save the file. Check that exact saved PNG on a separate canvas over both light and dark backgrounds; the steps below keep your layered original untouched. PNG supports transparency; JPEG does not.
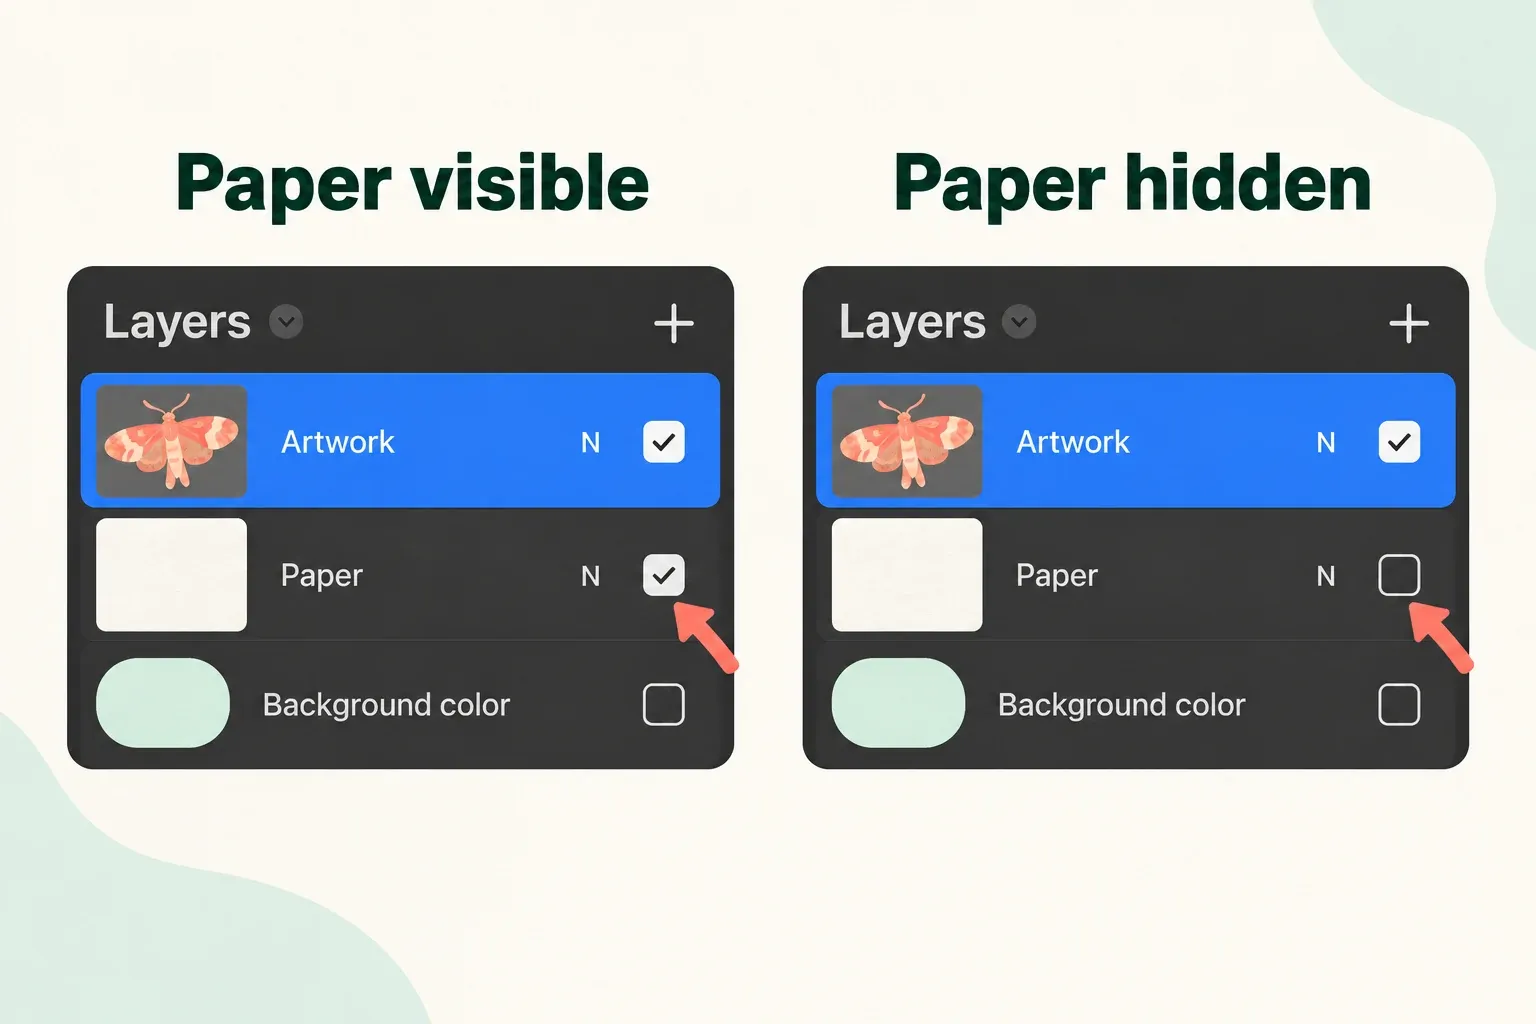
Hide Background color
Open Layers and turn off the visibility checkbox beside Background color at the bottom of the stack. Also inspect any imported paper texture or solid layer that may be covering the full canvas; hiding only Background color will not remove pixels from another layer.
Export through Share
Open Actions → Share, then choose PNG under Share Image. PNG preserves transparency; JPEG does not support it. Choose an available destination such as Files in the iPad share sheet; the options depend on the apps installed on your iPad. Keep the .procreate artwork as the editable master because the PNG contains a rendered image rather than the original layer structure.
Check the actual PNG on your iPad
A preview background alone cannot establish whether a PNG is transparent: alpha controls how its pixels combine with a background. I would check the file you actually saved before editing the source again.
- Keep your original artwork. Return to Gallery, tap + and choose a new canvas preset for this temporary check.
- In the new canvas, choose Actions → Add → Insert a file. Browse to the exported
.pngin Files and tap it. This inserts the saved image; it does not inspect the original layered artwork by mistake. - If Transform is active, tap its arrow button to commit the placement and exit. Do not judge pixel sharpness from this temporary placement; this check is for the background.
- Open Layers and tap Background Color to choose a dark color. Keep that background visible and the inserted PNG visible above it. Then change Background Color to a light color. Leave any other layer empty or hidden.
The area outside your subject should show the changing background. A solid box that completely obscures both colors contains an opaque backdrop. A faint box or fringe can contain partly transparent pixels, so inspect the edge separately. If your file needs to retain a paper texture, decide whether that texture belongs in the delivery instead of hiding it automatically.
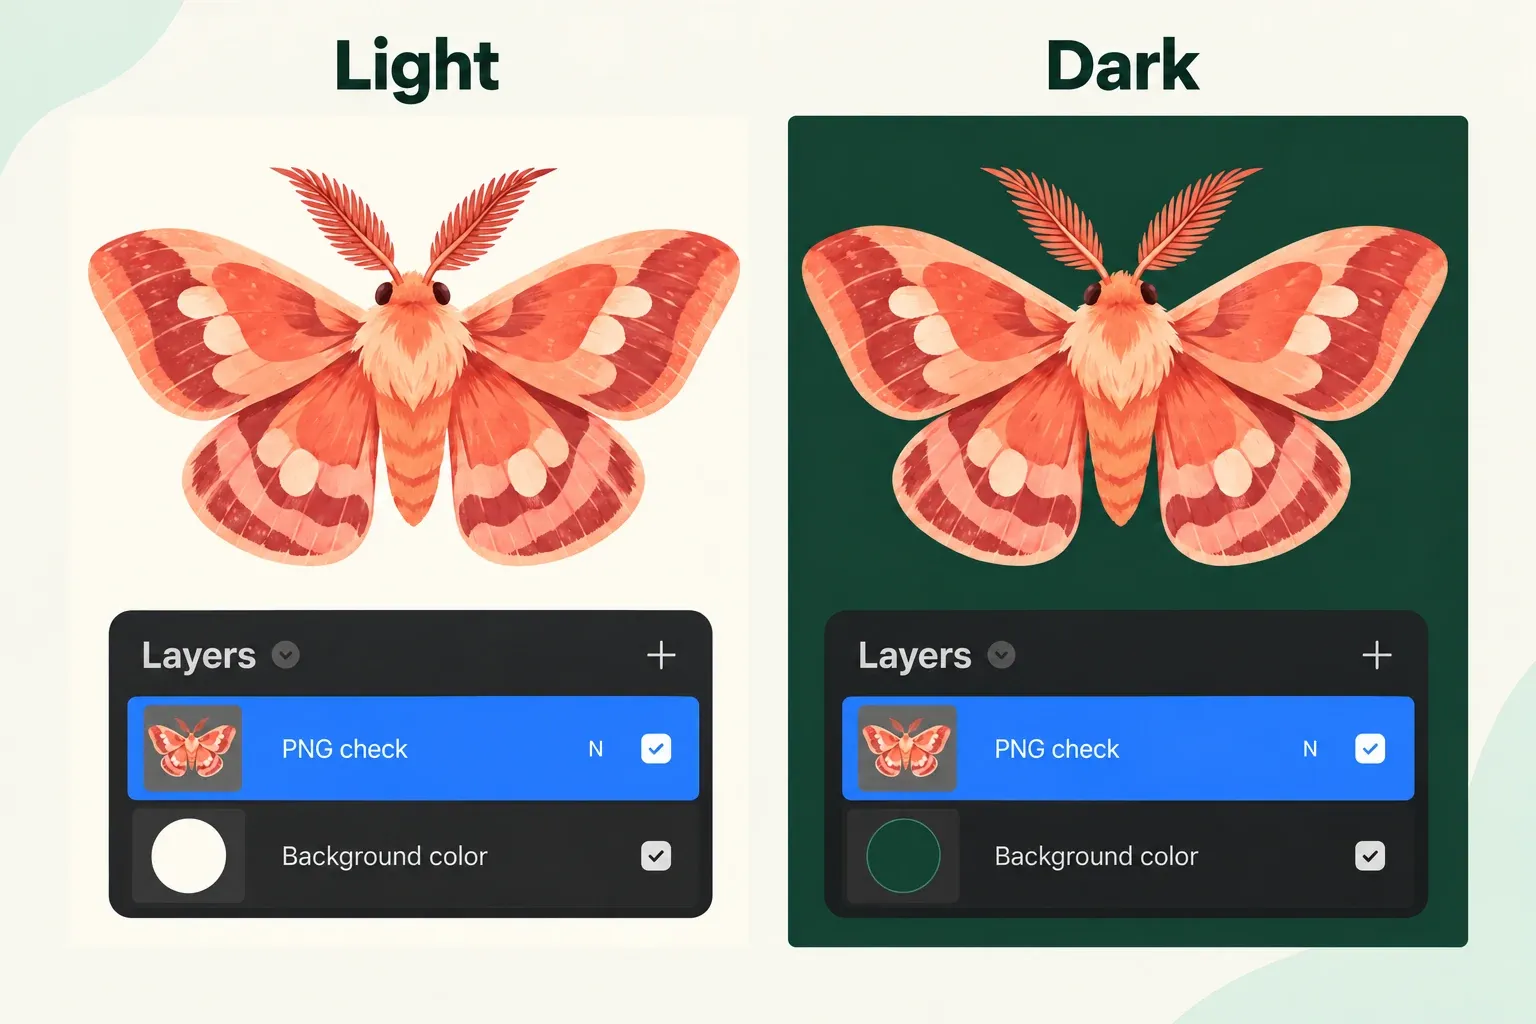
If a rectangle appears, return to the source and hide visible layers one at a time. Background color can be off while an imported paper texture or a painted layer still contains white pixels.
Keep clear file names
Use a name that identifies the artwork, purpose, and revision, such as night-garden_sticker_transparent_v03.png. Store the native Procreate file separately. That naming pattern helps distinguish the flattened export from its editable source.
Transparent export checks
| Result | Likely explanation | Check |
|---|---|---|
| Preview shows white | The preview alone does not establish alpha | Insert the exact saved PNG into the temporary canvas above |
| Solid box hides both test backgrounds | The file contains an opaque backdrop | Check visible background layers in the source |
| Only the edge looks pale | Partial edge pixels may retain a light color | Compare the edge over light and dark fields; zoom in on the source |
| Received file fails the background check | The delivery differs from the local PNG, or the wrong file was sent | Compare the actual downloaded file and the destination requirements |
Find halos and hidden semi-transparent pixels
If artwork was separated from a background, its partly transparent edge pixels can retain that background color. Such pixels may produce a pale or dark fringe on a different field. This is a condition of those edge pixels, not proof that PNG export created the problem. Place contrasting temporary layers behind the artwork in Procreate and inspect both light and dark backgrounds. Hide those temporary background layers before exporting the transparent PNG.
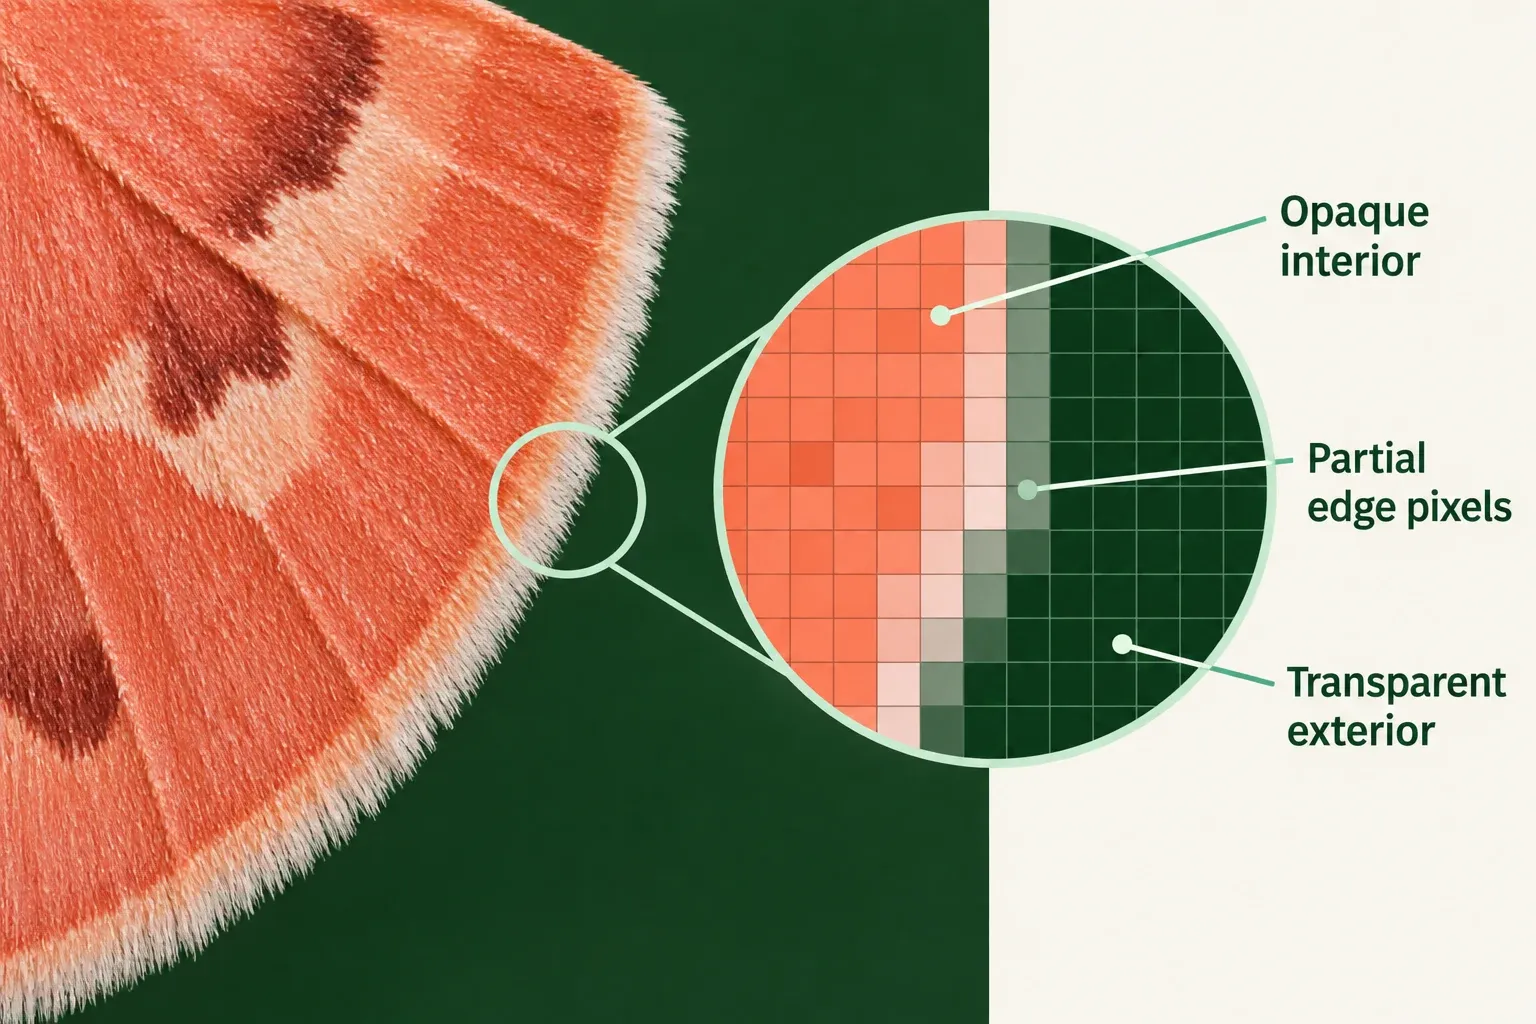
If the halo follows the artwork, examine masks, feathered selections, soft erasing, and transformed edges. Do not solve every case by deleting anti-aliasing; smooth edges need partial pixels. The goal is an edge whose color belongs to the artwork rather than a removed matte. Keep a duplicate before cleaning so fine details can be compared instead of progressively erased.
Compare the local PNG with the destination copy
Upload the original saved PNG, then reopen or download the actual destination file. Check that actual received file with the same contrasting-background method. If the local file passes but the received file does not, confirm that the original PNG was sent and read the named destination's transparency requirements before changing the artwork. A thumbnail alone does not establish what was delivered.
Keep the verified transparent export and native Procreate source. Create any white-background or JPEG derivative separately and name it for its purpose, such as logo-web-white-bg.jpg. Edge cleanup and new sizes should begin from the layered source.
This is an independent guide. It is not affiliated with or endorsed by Procreate.
If the destination is print, calculate the required canvas pixels before exporting the final artwork.