
I'd choose Procreate for a raster illustration that you plan to finish on iPad. I'd choose Adobe Fresco when editable vector strokes, Live watercolor or oil brushes, or drawing on a compatible Windows device are requirements. For a first drawing, the deciding question is what you need to keep editable after the picture looks finished.
My Procreate recommendation assumes that an iPad painting and a native local master suit the project. Fresco becomes the stronger choice when its particular brush models or Adobe document routes solve a specific delivery problem. A Photoshop recipient alone leaves both options open.
Choose by the finished work
| Your requirement | My choice | Reason and boundary |
|---|---|---|
| Finish a raster painting on iPad | Procreate | Its native .procreate export keeps the editable Procreate master. Fresco can also paint with pixel brushes. |
| Start drawing without an app purchase | Fresco | Fresco is free; extra cloud storage, premium Fonts and receiving applications need separate consideration. |
| Keep brush strokes editable as vectors | Fresco | Its vector brushes create scalable strokes that can continue in Illustrator. Pixel and Live Brush marks remain raster content. |
| Use a watercolor or oil simulation | Fresco, after checking the device | Adobe describes its Live Brushes as pixel-based, physics-driven simulations. Some Surface devices have a watercolor restriction. |
| Continue painting in Photoshop | Either, depending on the file route | Procreate has layered PSD export; Fresco has a Photoshop cloud-document route. Agree on the required edits first. |
| Draw on Windows hardware | Fresco, if the device qualifies | Adobe's supported-device requirements include compatible Windows configurations and specific ARM Surface models. |
Check your device first
Procreate for iPad 5.4.14 requires iPadOS 16.3 or later. This comparison concerns that iPad app.
Adobe's current requirements for Fresco 7.8, released in September 2026, specify iPadOS 18 or later on a listed compatible iPad. For iPhone, the App Store listing for Fresco 7.8.1 requires iOS 18.0 or later. Check the model list as well as the operating system. The same page lists Windows configurations; macOS and Android are absent from its drawing-device list.
On iPad and iPhone, Adobe specifies 5 GB to install and run Fresco, with 16 GB of available storage recommended. Those figures concern space on the device. The free plan's cloud allowance is a different limit.
For Windows, match the OS, graphics hardware and driver requirements before buying a device for Fresco. Adobe limits ARM availability to the named Surface models. A Snapdragon processor alone isn't enough. Adobe's device compatibility table marks watercolor brushes as unsupported on Surface Pro X and Surface Pro 9 models with ARM processors. If watercolor is the reason for your choice, that exception matters more than a general feature list.
Separate raster, Live Brush and vector work
Procreate's painting workflow is raster-based, so choose canvas pixel dimensions for the intended output. Its brush engine combines shapes and grain to build strokes. That's useful when you want to design the texture of a painted mark. It doesn't turn that mark into an editable vector path.
Fresco gives you three brush models to distinguish:
- Pixel brushes serve raster drawing and painting within Fresco's documented brush range.
- Live Brushes use Adobe's watercolor and oil simulation. They are pixel-based, even when the canvas also contains vectors.
- Vector brushes produce strokes that retain fidelity when scaled. Choose them when those strokes need to remain vectors in the next application.
Keep the distinction through the layer structure. Fresco places pixel and vector drawing on separate layers. Using Convert to Pixel on a vector layer makes it usable with pixel and Live Brushes, but the converted artwork can pixelate when enlarged. Adobe also warns that merging pixel and vector layers converts the vectors to pixels.
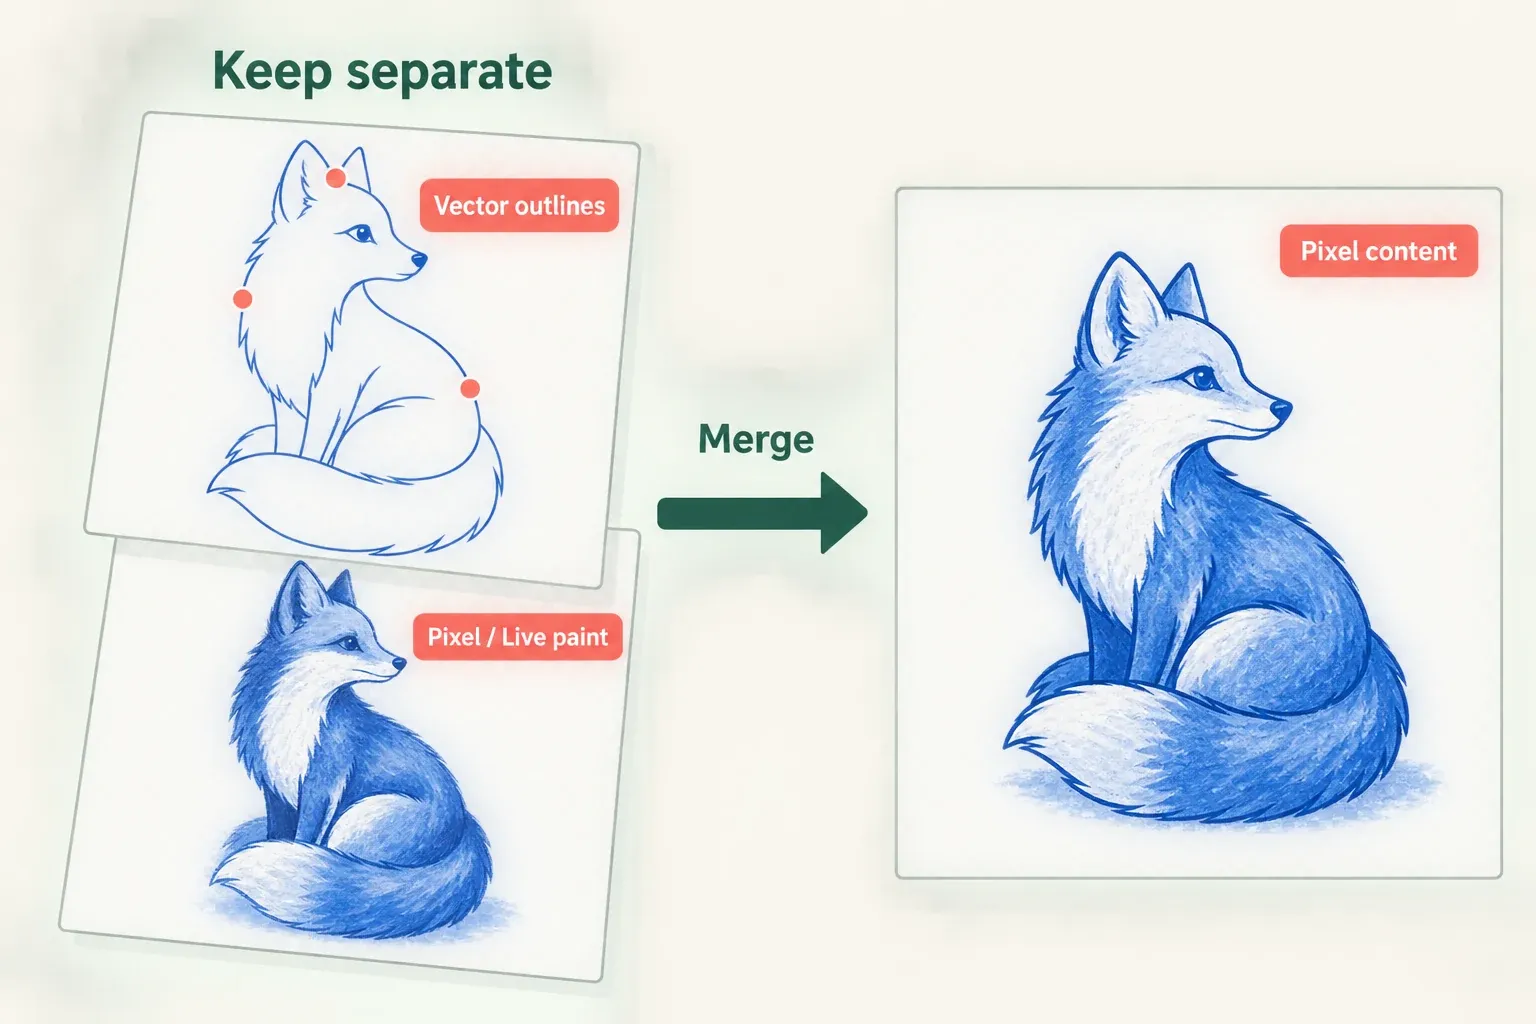
Take a watercolor texture behind clean vector outlines: that's mixed artwork. Sending the document to Illustrator can preserve the separate layer types, but it can't turn the watercolor texture into editable vector strokes. Keep the vector elements separate if the recipient needs to reshape them.
Procreate's import support is another boundary: .ai, .eps and .svg files are unsupported. That's why I'd choose Fresco for a brush drawing that must continue as editable vectors in Illustrator.
Choose the Adobe handoff you actually need
When Photoshop is next
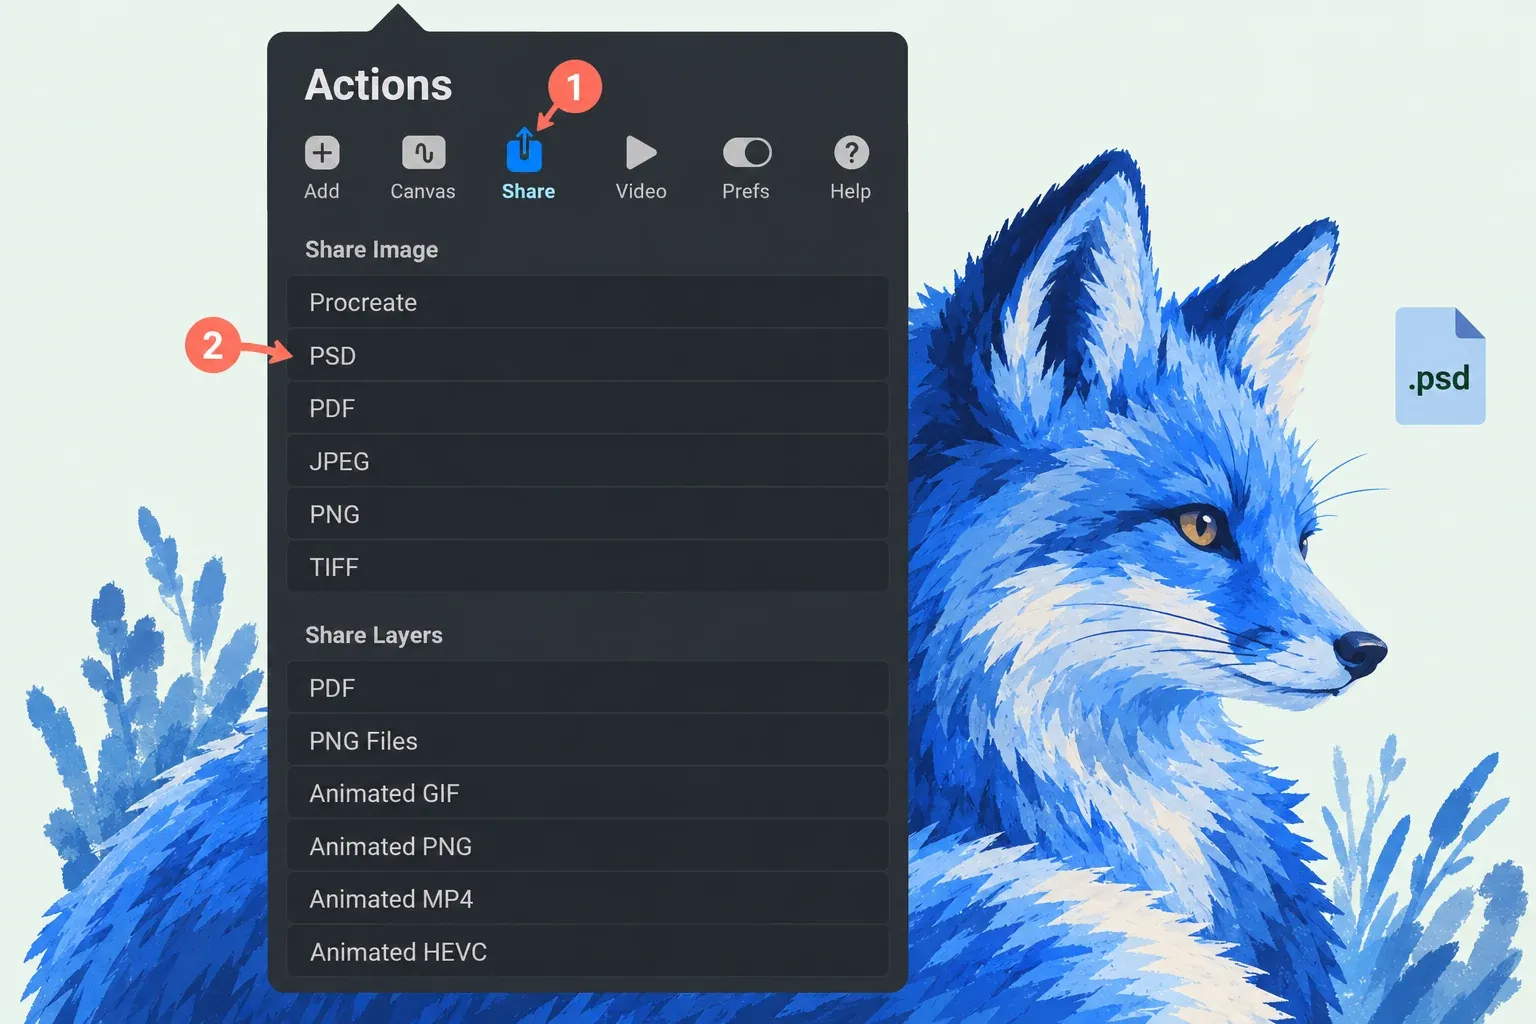
In Procreate, Actions → Share → PSD exports layers, layer names, opacity, visibility and blend modes. That makes a layered Photoshop delivery a valid reason to consider Procreate. My default is to keep a .procreate master first, then check the masks, effects, text and appearance the recipient needs. Those checks matter if the receiving app must preserve more than those layer properties.
Fresco's advantage here is its connected document route. Adobe documents shared cloud-document access with Photoshop on iPad and desktop. Use the same Adobe account and allow the document to sync. A file created in desktop Photoshop must first be saved as a cloud document to appear through that route. You still need the appropriate access to the receiving Photoshop app.
Fresco also exports PSD files. Whether you send a file or a cloud document, ask one concrete question: can the recipient make the required edits? An app connection or a format name cannot, on its own, tell you whether every feature stays editable.
When Illustrator needs vector strokes
Fresco's current sharing instructions use Share → Send to Illustrator, followed by the iPad or desktop option. Adobe says that Illustrator recognizes separate vector and pixel layers, with vector layers editable as vectors. You can place a raster image in Illustrator, but its painted marks don't become vector paths through this transfer.
This is the clearest reason to choose Fresco over Procreate: you need brush-drawn vector content to remain editable in Illustrator. Decide which elements require that treatment before combining layers, and include Illustrator access in the workflow cost.
Compare the complete cost
The US App Store lists Procreate at US$12.99. Procreate describes the iPad app as a purchase without a subscription. Check your own storefront for its local price.
Fresco is free to use. Adobe's cloud-storage table gives the free single-app plan 5 GB, while its named paid Fresco + Photoshop on iPad plan has 100 GB. Adobe also offers paid access to premium Fonts and additional storage. That named plan should not be treated as included desktop Photoshop or Illustrator access.
If you only need the drawing app, Fresco has the lower initial software cost. If your assignment ends in another Adobe application, compare the access you already have with any additional plan you need. Procreate's one-time purchase can cover a self-contained iPad painting, but it doesn't buy access to those receiving applications either.
Check layer capacity and animation needs
A large raster project needs a workable layer budget. Procreate's maximum layer count depends on iPad RAM and canvas pixel dimensions. Put your actual device and intended canvas into its calculator before committing to a structure with many separate parts. A layer count quoted for another iPad or a smaller canvas doesn't tell you how many layers your intended canvas will allow.
For animation, Procreate's Animation Assist uses layers as frames, with a layer group treated as one frame. Fresco supports frame-by-frame animation, motion paths, or a combination. When an element has to move along a path, I'd choose Fresco. If delivery includes transparent video, Adobe lists ProRes 4444 among Fresco's motion export formats. Check the required output format before you settle on the animation workflow.
Plan offline access and a master copy
Procreate stores artwork locally in the app, and its Gallery artwork does not automatically sync to iCloud. Its newer iCloud option for brush-library storage is a separate system. Export a .procreate master and keep copies in the secure locations Procreate recommends.
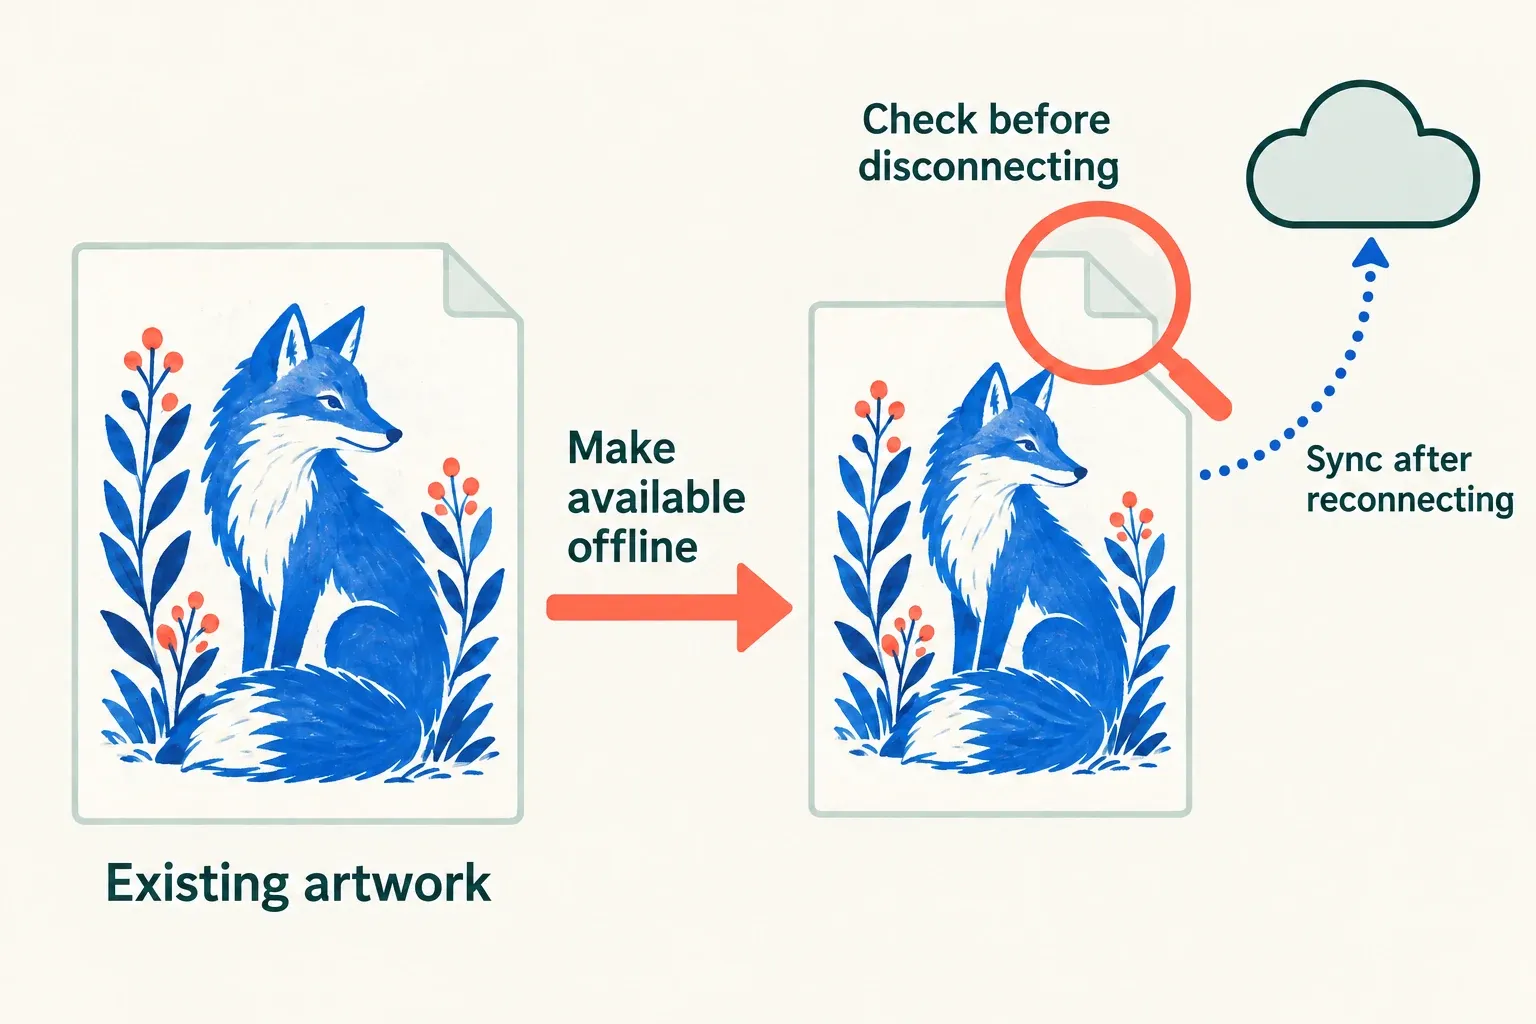
Fresco requires internet and registration for activation and online services. Before taking an existing cloud artwork offline, use Make available offline from its thumbnail menu. Adobe says that offline work is saved locally and syncs when connectivity returns. Keep an independent copy of important work as well. Decide how you'll retain it if the device or account changes.
Set the delivery requirement before drawing
Write the requirement in one sentence: a finished raster image, a layered PSD for Photoshop, or editable vector strokes for Illustrator. Add the device and any required animation format. Those conditions tell you which choice above applies.
If a raster painting on iPad covers the assignment, use the first Procreate illustration guide to plan a manageable drawing with a deliberate canvas and layer structure.